
UPDATE: We updated this tutorial for the Firebase 3.1.0 SDK which now supports the Firebase Realtime Database and Firebase Authentication.
Here at Firebase, we’re big React fans. Firebase synchronizes application state, and React re-renders the application UI based on state changes. It’s a perfect fit.
And with React Native, app development became a lot easier for JavaScript developers. Using React Native you can build real native apps with just JavaScript. And that’s just awesome-sauce. We live in the future. Let’s get started.
Setup
If you want to dive right into the code, you can check out the final GitHub repo here. Otherwise, let’s go through this step-by-step.
Getting started with React Native is fairly easy, but there are some gotchas you should be aware of. If you already have React Native set up, you can skip this section.
First, you’ll need Homebrew, which is easy to install. You’ll also need Node.js 4.0 or higher. The React Native team recommends using nvm to manage your node versions (and I do too).
Once those tools have been installed, run the following commands:
brew install watchman
npm install -g react-native-cli
Then finally, you can begin your project with the CLI command:
react-native init GroceryApp # or whatever you want
Open the main folder in your favorite editor.
atom GroceryApp # if you’re into Atom
Build and run
To build a React Native project, run the following command:
react-native run-ios
This should launch the Simulator, and you should see the boilerplate screen.
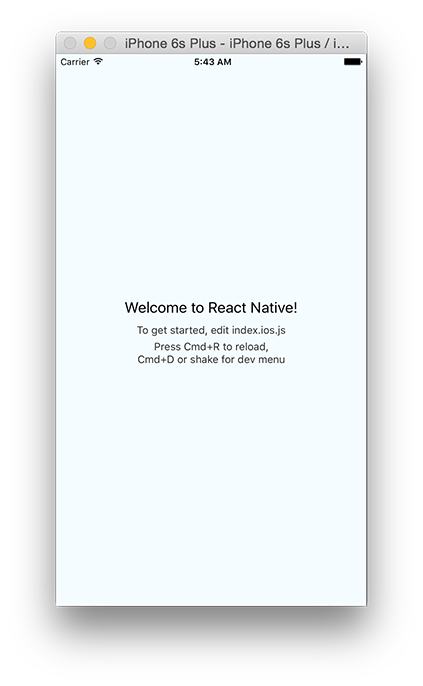
React Native comes with hot-reloading, which means you can make an edit to the code, index.ios.js, and then hit Cmd+R and see your changes instantly update. And if you’re an iOS developer, or really any kind of developer, you know how cool that is.
With the build setup done, let’s get Firebase up and running.
Firebase Setup
React Native manages dependencies through npm. To install Firebase, run the following command at the root of the project.
npm install firebase --save
Open index.ios.js and add the following line to the top:
import * as firebase from 'firebase';
Then right above the component, initialize Firebase with your config values:
// Initialize Firebase
const firebaseConfig = {
  apiKey: "<your-api-key>",
  authDomain: "<your-auth-domain>",
  databaseURL: "<your-database-url>",
  storageBucket: "<your-storage-bucket>",,
};
const firebaseApp = firebase.initializeApp(firebaseConfig);
What’s a const? A const is a read-only reference to a value, which makes sense here, because you don’t want to ever override the value of Firebase. You can use this keyword since you’re using Node 4.0 or higher. If your editor yells at you, it’s telling you a lie.
One ES2015 feature isn’t enough. Rather than use React.createClass() to define components, let’s use classes.
ES2015 (ES6) Components
React is component-based. Which means an app is just a tree of components, starting with a root component. As of React 0.14, you can use ES2015 classes to define React components.
In index.ios.js, let’s change the component to use a class rather than React.createClass().
class GroceryApp extends Component {
  render() {
    return (
      <View style="{styles.container}">

      </View>
    );
  }
}
Why ES2015 classes over React.createClass()? While there is quite the debate over the subject, it boils down to a matter of taste.
The shell of the app is complete. Let’s make it look good, or at least halfway decent.
Styling in React Native
React Native uses JavaScript rather than CSS for styling. This may sound like an extreme divergence, but it’s really not all that different. To declare a set of styles, you create a StyleSheet.
var styles = StyleSheet.create({
  container: {
    backgroundColor: '#f2f2f2',
    flex: 1,
  },
});
A StyleSheet contains a set of objects that represent CSS-like styles. Then you use these styles on a React component:
<View style="{styles.container}">
  I’m a container lol!
</View>
So don’t worry about losing any of your CSS skills. If anything, you should really learn CSS Flexbox to make styling in React Native a breeze.
Now that you’re a pro at styling in React, let’s declare the styles for the app.
Add Styles
Create a file named styles.js and add the following code from this file. These are the styles we’ll be using for the app.
You’ll notice that React Native uses CommonJS modules. At the bottom of styles.js, the StyleSheet is exported using module.exports.
This will allow you to import these styles using require(). Open index.ios.js, and add the following line of code:
const styles = require('./styles.js')
Make sure to remove the styles variable at the bottom of the file.
The styles are now in place. Let’s take a look at the app’s component structure.
Break the UI into a component hierarchy
The best advice I have ever read on using React, is to start off by breaking the UI into a component hierarchy. Below is a visual outline of the app’s component hierarchy.
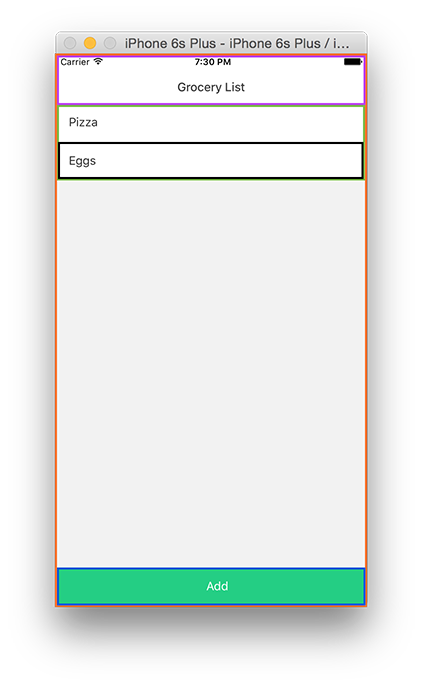
The app is made up of five components:
- GroceryApp (orange): contains the entire app
- StatusBar (purple): displays the title of the view
- ListView (green): displays the list of grocery items
- ListItem (black): displays an individual item from the list
- ActionButton (blue): adds an item to the list
Create a folder named components. Each one of these components is stored in the components folder. The exception is GroceryApp, since it is contained in index.ios.js.
Add each one of these components below to the components folder:
ActionButton.js
'use strict';

import React, {Component} from 'react';
import ReactNative from 'react-native';
const styles = require('../styles.js')
const constants = styles.constants;
const { StyleSheet, Text, View, TouchableHighlight} = ReactNative;

class ActionButton extends Component {
  render() {
    return (
      <View style={styles.action}>
        <TouchableHighlight
          underlayColor={constants.actionColor}
          onPress={this.props.onPress}>
          <Text style={styles.actionText}>{this.props.title}</Text>
        </TouchableHighlight>
      </View>
    );
  }
}

module.exports = ActionButton;
ListItem.js
import React, {Component} from 'react';
import ReactNative from 'react-native';
const styles = require('../styles.js')
const { View, TouchableHighlight, Text } = ReactNative;

class ListItem extends Component {
  render() {
    return (
      <TouchableHighlight onPress={this.props.onPress}>
        <View style={styles.li}>
          <Text style={styles.liText}>{this.props.item.title}</Text>
        </View>
      </TouchableHighlight>
    );
  }
}

module.exports = ListItem;
StatusBar.js
'use strict';
import React, {Component} from 'react';
import ReactNative from 'react-native';
const styles = require('../styles.js')
const { StyleSheet, Text, View} = ReactNative;

class StatusBar extends Component {
  render() {
    return (
      <View>
        <View style={styles.statusbar}/>
        <View style={styles.navbar}>
          <Text style={styles.navbarTitle}>{this.props.title}</Text>
        </View>
      </View>
    );
  }
}

module.exports = StatusBar;
With the components added, let’s make a static version of the app.
Static Mockup
In index.ios.js, add the following imports to the top of the page:
import React, {Component} from 'react';
import ReactNative from 'react-native';
import * as firebase from 'firebase';
const StatusBar = require('./components/StatusBar');
const ActionButton = require('./components/ActionButton');
const ListItem = require('./components/ListItem');
const styles = require('./styles.js');
Then add the following snippet of code:
_renderItem(item) {
    return (
      <ListItem item="{item}" onpress="{()" ==""> {}} />
    );
  }

  render() {
    return (
      <View style="{styles.container}">

        <StatusBar title="Grocery List">

        <ListView datasource="{this.state.dataSource}" renderrow="{this._renderItem.bind(this)}" style="{styles.listview}/">

        <ActionButton title="Add" onpress="{()" ==""> {}} />

      </View>
    );
  }
The render() function is the main view of the app, and _renderItem() sets the individual items in the list.
Next, create a constructor for the root component, GroceryApp.
constructor(props) {
  super(props);
  this.state = {
    dataSource: new ListView.DataSource({
      rowHasChanged: (row1, row2) => row1 !== row2,
    })
  };
}
The component has a special property called state, which manages the entire data flow of the application. We’ll dive deeper in the next section.
The app’s state is a ListView.DataSource, which is a class that provides efficient data processing to a ListView component. The next step is to display this data.
Each component has a lifecycle, where certain functions are called at important events. When the component has first been rendered, componentDidMount() is called. This is where we want set any initial state of the app.
componentDidMount() {
    this.setState({
      dataSource: this.state.dataSource.cloneWithRows([{ title: 'Pizza' }])
    })
  }
Build and run the app, and you should see the following static app.
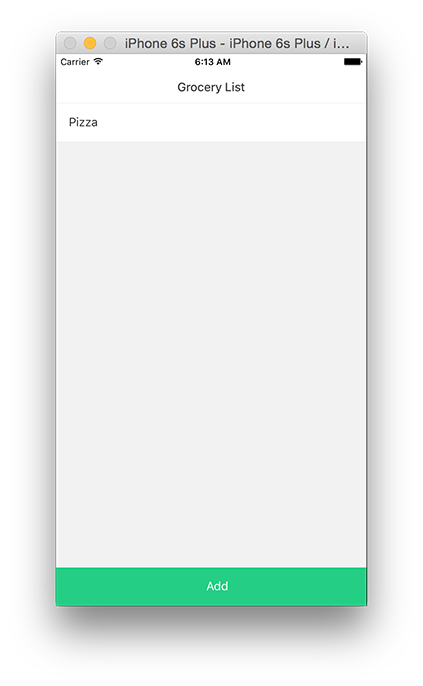
Each one of these components just simply displays data, or sets a callback function for a touch.
The key thing to understand is that these components are not state-ful. They have properties that are set by their root component, GroceryApp. To begin to understand React, you have to learn how to manage state.
State
State is simply data that can change. This data is called state, because it represents the “state” of your application. If this data changes, your application will likely look different, hence being in a different “state”. State is usually things like a list of todos, or an enabled/disabled button.
The root component will serve as the holder of state. State changes start at the root component, which is then responsible for updating the properties of its child components.
Component properties are immutable, meaning they can’t be modified. So, if you can’t modify the properties, how do they ever change? You re-render, the application by calling setState(), like seen in componentDidMount().
The setState() function is special because every time it is called, it will attempt to re-render the entire app. This means that if a child property is different from the last state, it will be re-rendered with the new value.
This is where React fits perfectly with Firebase. Because the Firebase database synchronizes application state across multiple devices, and React efficiently re-renders application state changes.
Realtime Database listener
Create Realtime Database reference as a property in the constructor:
this.itemsRef = firebaseApp.database().ref();
Then, add the following function to the GroceryApp component:
listenForItems(itemsRef) {
    itemsRef.on('value', (snap) => {

      // get children as an array
      var items = [];
      snap.forEach((child) => {
        items.push({
          title: child.val().title,
          _key: child.key
        });
      });

      this.setState({
        dataSource: this.state.dataSource.cloneWithRows(items)
      });

    });
  }
This function creates a value listener for all grocery items. Whenever an item is added, changed, or removed, you’ll get the entire result set back as a DataSnapshot, from the Firebase SDK. Using the DataSnapshot, you call forEach(child), which iterates through all of the children and adds them to an array as a grocery list item. Notice in the .forEach function, a _key property is created from the DataSnapshot’s .key() value. This makes life much easier when doing data operations later down the line.
Once the array is populated, you’ll update the dataSource property on state using dataSource.cloneWithRows(items). The cloneWithRows() function is just a convenience method for creating a new ListView.DataSource based on the same DataSource previously defined.
Next, you write the listen up to componentDidMount():
componentDidMount() {
    this.listenForItems(this.itemsRef);
  }
Build and run the app. You should see an empty page, but try adding a few items using the Firebase App Dashboard or the super awesome data viewer Vulcan, and you’ll see it update in realtime!
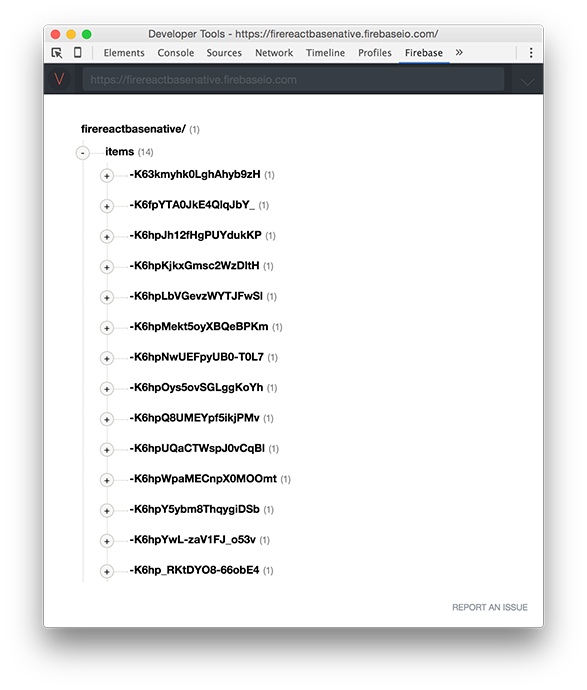
This is awesome, but you’d rather have the “Add” button working. Let’s tackle that in the next section.
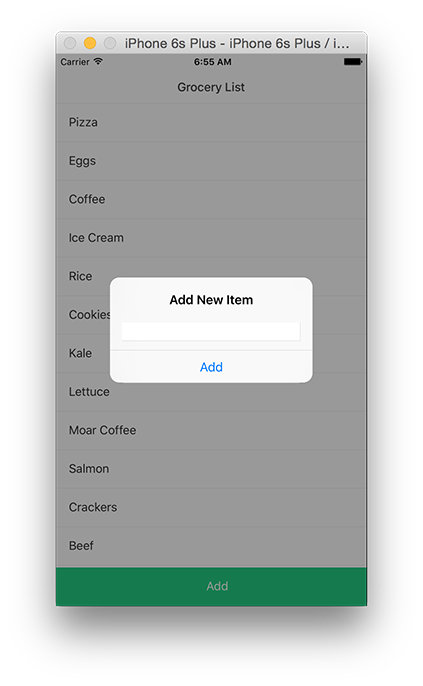
Add Item
When the ActionButton is tapped, an alert should pop up prompting the user to enter an item. The AlertIOS API is what you’ll use to create this alert box.
Add the following function to the GroceryApp component:
_addItem() {
    AlertIOS.prompt(
      'Add New Item',
      null,
      [
        {
          text: 'Add',
          onPress: (text) => {
            this.itemsRef.push({ title: text })
          }
        },
      ],
      'plain-text'
    );
  }
The AlertIOS API is quite extensible when it comes to building alerts. The first two parameters are simple, they’re just the title of the alert box and an optional message. The third parameter is the meat of the API. Here you create an array that specifies the buttons available to the user. Each button can have a text, style, and an onPress callback function. The last parameter is type the of input, whether plain-text or secure-text.
To add an item, create an object in the buttons array. This object can add items in the onPress callback. The callback returns the text the user has entered. Use this text to .push() a new child onto the /items location.
Next, you’ll need to update render() to assign the onPress property of the ActionButton:
<ActionButton title="Add" onpress="{this._addItem.bind(this)}">
</ActionButton>
Build and run. When you tap add, and enter an item title, you should see it update on the list.
Awesome, but what’s a grocery list that can’t complete items?
Complete Items
The user can complete an item by tapping on it to open up an alert box. If they press the “Complete” option, you can delete it from the list.
Modify _renderItem(item) to include an onPress callback:
_renderItem(item) {

    const onPress = () => {
      AlertIOS.prompt(
        'Complete',
        null,
        [
          {text: 'Complete', onPress: (text) => this.itemsRef.child(item._key).remove()},
          {text: 'Cancel', onPress: (text) => console.log('Cancel')}
        ],
        'default'
      );
    };

    return (
      <ListItem item="{item}" onpress="{onPress}">
    );
  }
To “complete” an item, you’ll need to delete it from the Firebase database. Using .child(key), you can drill down into a specific item in the list. The onPress callback is a closure, therefore it has access to the outer environment which contains the item parameter. This is where the _key property comes in hand.
When the “Complete” option is tapped, you can find the specific child by using the _key property on item. Then you can call .remove() to delete the item in the Firebase database.
Build and run, yet again. Tap any ListItem , tap “Complete”, and you should see it removed from the list.
Get the code, give a star
Check out the completed app on Github. And, if you’re feeling generous, we would love a star. Feel free to fork the repo, and even send in a PR if you want.
Still having trouble?
If you’re running into issues, open up a question on Stackoverflow, we monitor the Firebase tag closely, or drop a line in our community Slack Team.