
In this article we will show how to send notifications between Android devices using Firebase Database, Cloud Messaging and Node.js. Since this article was written, we also released Cloud Functions for Firebase, which offers a way to send notifications without requiring a Node.js server. See the documentation on sending notifications with Cloud Functions to learn more.
The Firebase Database is a great back-end for building multi-user mobile applications. Whenever multiple users have the application open, changes that any user makes are synchronized to all other connected users within milliseconds.
A great example of this is a chat application: any message that a user sends is instantly synchronized to other users. That leads to a very smooth chat experience.
But what if one of the users doesn’t have the application running on their Android device? That means that the device is not connected to the Firebase Database servers, so it will not receive the changes automatically. This is fine for regular chat messages, but in most chat apps you want to pull the user back in when someone @ mentions them (e.g. “hey @puf, can you help out here?”)
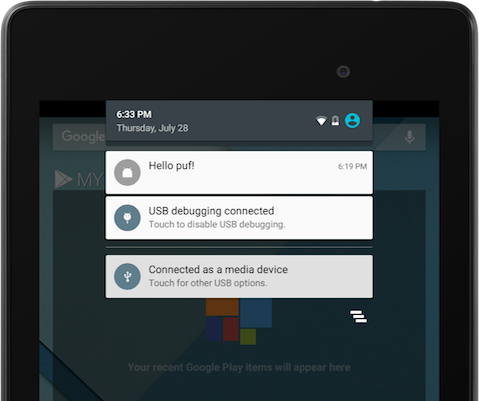
For this scenario, you’ll typically send a notification to the user’s device using Firebase Cloud Messaging. Such a notification will then show up in the notification area of the device, providing a great way to get the user back into the application when an interesting event happens.
In this article, we’ll use Firebase Cloud Messaging to deliver the notification to the device. We’ll write a Node script that interacts with FCM, so that we don’t have to expose our API key on the Android devices. But first: we need to figure out what the code for sending a notification will look like on the Android device itself.
Sending a push notification from the Android app
To send a notification to a user, our Android application does the following:
sendNotificationToUser("puf", "Hi there puf!"); The sendNotificationToUser() method is a helper that we implemented like this:
public static void sendNotificationToUser(String user, final String message) {
    Firebase ref = new Firebase(FIREBASE_URL);
    final Firebase notifications = ref.child("notificationRequests");

    Map notification = new HashMap<>();
    notification.put("username", user);
    notification.put("message", message);

    notifications.push().setValue(notification);
}
This is probably not what you expected. This code just writes the notification data to the Database. How is that sending a notification?
It is not. We are using the database as a queue here. Our Android app writes the request to send a notification into the database, where our Node script will pick it up and send the notification through Cloud Messaging. We’ll have a look at that script in a minute. First, we want to talk a bit about how we structured the data for this application.
Data structure
Just like with any application, the data structure is probably one of the most important parts of your Firebase-backed application. We’ve already seen the data structure for sending notifications:
  notificationRequests
    $pushid
      message: "Hello there"
      username: "puf"
This is the node that our Android application was writing to. Each notification request consists of the message that we’re sending and the name of the user we’re notifying. How we’re mapping the username to an actual notification depends a bit on your application. But in this case, we’re going to use topic based notification: a username is mapped to a topic /topics/user_. So in my case the message will be sent to (and the Android application will subscribe to) /topics/user_puf.
Now it’s about time we get to the Node code I’ve been talking about.
Node code
Now that we know how the Android app writes a notification request into the database, and we know what the database structure looks like, it’s time to write the code that will actually be sending the notifications.
This is going to be a Node process, which runs on a trusted environment, such as a Google App Engine Flexible Environment. The node script monitors the notification queue that we saw above. For every child that is added to this queue, it extracts the necessary information and then calls the Cloud Messaging REST API to send the notification. If that succeeds, it removes the notification request from the queue.
var firebase = require('firebase-admin');
var request = require('request');

var API_KEY = "..."; // Your Firebase Cloud Messaging Server API key

// Fetch the service account key JSON file contents
var serviceAccount = require("path/to/serviceAccountKey.json");

// Initialize the app with a service account, granting admin privileges
firebase.initializeApp({
  credential: firebase.credential.cert(serviceAccount),
  databaseURL: "https://<your database>.firebaseio.com/"
});
ref = firebase.database().ref();

function listenForNotificationRequests() {
  var requests = ref.child('notificationRequests');
  requests.on('child_added', function(requestSnapshot) {
    var request = requestSnapshot.val();
    sendNotificationToUser(
      request.username,
      request.message,
      function() {
        requestSnapshot.ref.remove();
      }
    );
  }, function(error) {
    console.error(error);
  });
};

function sendNotificationToUser(username, message, onSuccess) {
  request({
    url: 'https://fcm.googleapis.com/fcm/send',
    method: 'POST',
    headers: {
      'Content-Type' :' application/json',
      'Authorization': 'key='+API_KEY
    },
    body: JSON.stringify({
      notification: {
        title: message
      },
      to : '/topics/user_'+username
    })
  }, function(error, response, body) {
    if (error) { console.error(error); }
    else if (response.statusCode >= 400) {
      console.error('HTTP Error: '+response.statusCode+' - '+response.statusMessage);
    }
    else {
      onSuccess();
    }
  });
}

// start listening
listenForNotificationRequests();
_For more information on accessing Firebase from a server, see how to set up the Firebase Admin SDK. If you’re new to running your own node.js script on a server, learn more about running node.js on Google Cloud Platform. To learn how to send notifications without requiring a Node.js server, see the documentation on sending notifications with Cloud Functions.
Since we’re listening for child_added events, we’ll end up calling sendNotificationToUser() for each notification request in the queue. If sending succeeds, we remove the request from the queue. There is no auto-retry in this simple script, so it will only retry failed notifications when you restart the script. For a more scalable approach, consider using our firebase-queue library.
You’ve probably also noticed that we have an API_KEY constant in the script. That is the key that we got from Firebase Cloud Messaging to be able to send message. It is also the exact reason why we don’t want to run this code in the Android application itself: knowing the API key opens you up to abuse, since it can be used to send messages on your behalf. By having this key in our Node script on a server, we make sure the users of our Android application can’t get at it.
Receiving a notification in the Android app
The code for Android is pretty minimal, thanks to the way the Firebase Cloud Messaging SDK handles notification messages. When it receives a notification message while the app is in the background, it displays a message in the system notification area. When the user clicks the message, it automatically opens the app. This type of re-engagement is exactly what we want for this app, so we really only have to include the Firebase Messaging library and subscribe to the topic of our user name.
Subscribe to the topic
We are using a topic that matches our user name to ensure we get messages that are meant for this user.
String username = "puf";
FirebaseMessaging.getInstance().subscribeToTopic("user_"+username);
We’ve hard-coded the username in this snippet, since it depends on your app. But you can see that once you’ve determined the user name, all it takes to register for notifications (and display them when the app is backgrounded) is a single line of code.
If you’d also like to handle the notification when your app is in the foreground or would like to send more data along with the message, read the documentation about Firebase Cloud Messaging and its message types.
Summary
This post shows how you can send push notifications to an Android application using Firebase and a Node script. We’ve sent the notification from Android code, but could just as easily send them from any other application that can access the Firebase Database. Adding iOS support is easy too: just add the dependency and register for remote notifications.