
Firebase Authentication supports four federated Identity Providers out-of-the-box, making it super easy to authenticate with Google, Facebook, Twitter and GitHub. For example, in a web app all you need to sign in your Firebase users with Google is:
var google = new firebase.auth.GoogleAuthProvider();
firebase.auth().signInWithPopup(google);
However you may be interested in using other Identity Providers to let your users sign into your Firebase app. For example, Instagram can be a nice alternative especially if you plan on also using the Instagram API to let users share their Instagram photos.
Using Identity Providers for which Firebase doesn’t have built-in support is possible, but requires a bit more code, and a server. Let’s walk through the steps required to integrate Instagram Sign-In in a Firebase web app. Instagram uses OAuth 2.0 for sign-in, so this post should help you integrate with other OAuth 2.0 identity providers such as LinkedIn as well.
Design Overview
Instagram supports OAuth 2.0 as its main way to authorize apps and access user data which includes the Instagram user’s identity. You need to have the user go through the OAuth 2.0 auth code flow and grant access to your app. Here is how the OAuth 2.0 flow goes:
First the user needs to be redirected to the authorization endpoint of Instagram which will present the user with a consent screen the first time they are asked to grant access to your app. We’ll do that in a popup window.
After authorizing your app, users will be redirected back to your domain with an auth code. The auth code can be exchanged server side for an access token using your Instagram app’s credentials. In the process of exchanging the auth code, Instagram will also return the user identity (this sometimes requires an additional request with other OAuth 2.0 providers like LinkedIn).
On the server, once we have fetched the Instagram user information, we’ll create a Firebase custom auth token. This token will allow the user to sign-in into Firebase in our web app using the signInWithCustomToken method.
We’ll also pass the user profile information that we got from Instagram such as the display name and the photo URL so that we can update the Firebase profile on the client - Note: Instagram does not provide the email of the user so we we’ll have a Firebase account without an email, which is fine. Once done we close the popup and Voila! your user is signed into Firebase with profile data from their Instagram account.
Let’s build it!
Let’s now go into a bit more details and look at how to implement the key points of this integration. We’ll be writing our backend in Node.js.
Register your app with Instagram
You’ll need to add a button on your web app which starts the Instagram auth flow. Before we do this you’ll first need to register your application on the Instagram Developers console so that we can get your app credentials which are needed for OAuth 2.0.
In your Instagram app’s configuration make sure you have whitelisted http://localhost:8080/instagram-callback (for testing) and https:///instagram-callback (your production domain) as valid redirect URIs. Now take note of your Instagram Client ID and Client Secret. You’ll need them for later.
This is a typical step you’ll have to make with every OAuth 2.0 providers: register your app and whitelist callback URLs in return for a Client ID and Secret.
Configure Instagram’s OAuth 2.0
On the server we’ll be using the simple-oauth2 package which helps with hiding the details of the OAuth 2.0 protocol. You need to provide a few values to set this up such as your Instagram Client ID and Secret and the Instagram’s OAuth 2.0 token and authorization endpoints. Here are the values you need to use for Instagram:
// Instagram OAuth 2 setup
const credentials = {
 client: {
   id: YOUR_INSTAGRAM_CLIENT_ID, // Change this!
   secret: YOUR_INSTAGRAM_CLIENT_SECRET, // Change this!
 },
 auth: {
   tokenHost: 'https://api.instagram.com',
   tokenPath: '/oauth/access_token'
 }
};
const oauth2 = require('simple-oauth2').create(credentials);
Start the Instagram auth flow
On your server, add a URL handler that redirects the user to the Instagram Consent screen. As part of this, you’ll need to provide a Redirect URI which is where the user will be redirected back to after going through the Instagram auth flow. In our case we’ll use /instagram-callback as our callback handler path.
app.get('/redirect', (req, res) => {
  // Generate a random state verification cookie.
  const state = req.cookies.state || crypto.randomBytes(20).toString('hex');
  // Allow unsecure cookies on localhost.
  const secureCookie = req.get('host').indexOf('localhost:') !== 0;
  res.cookie('state', state.toString(), {maxAge: 3600000, secure: secureCookie, httpOnly: true});
  const redirectUri = oauth2.authorizationCode.authorizeURL({
    redirect_uri: `${req.protocol}://${req.get('host')}/instagram-callback`,
    scope: 'basic',
    state: state
  });
  res.redirect(redirectUri);
});
Also, to avoid session fixation attacks, pass a random string in the state parameter of the OAuth request and also save it as an HTTP cookie. This will allow us to compare the state parameter that we get back with the one saved in the cookie and make sure the flow originated from the app.
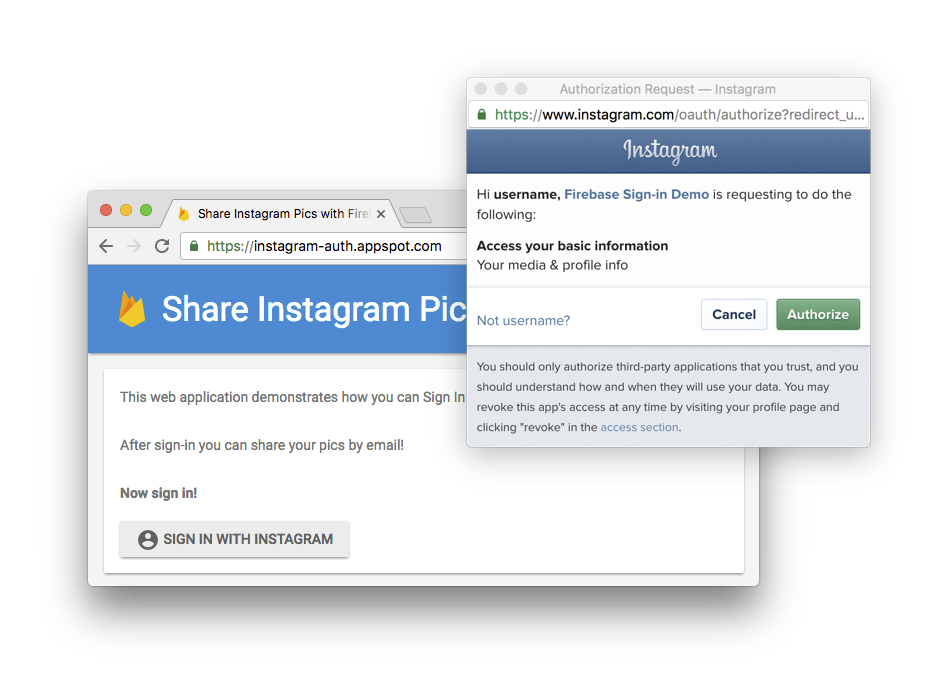
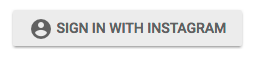
On the client, add a button which triggers a popup like this:
function onSignInButtonClick() {
  // Open the Auth flow in a popup.
  window.open('/redirect', 'firebaseAuth', 'height=315,width=400');
};
When a user clicks the sign-in button, a popup is opened and the user is redirected to the Instagram Consent Screen:
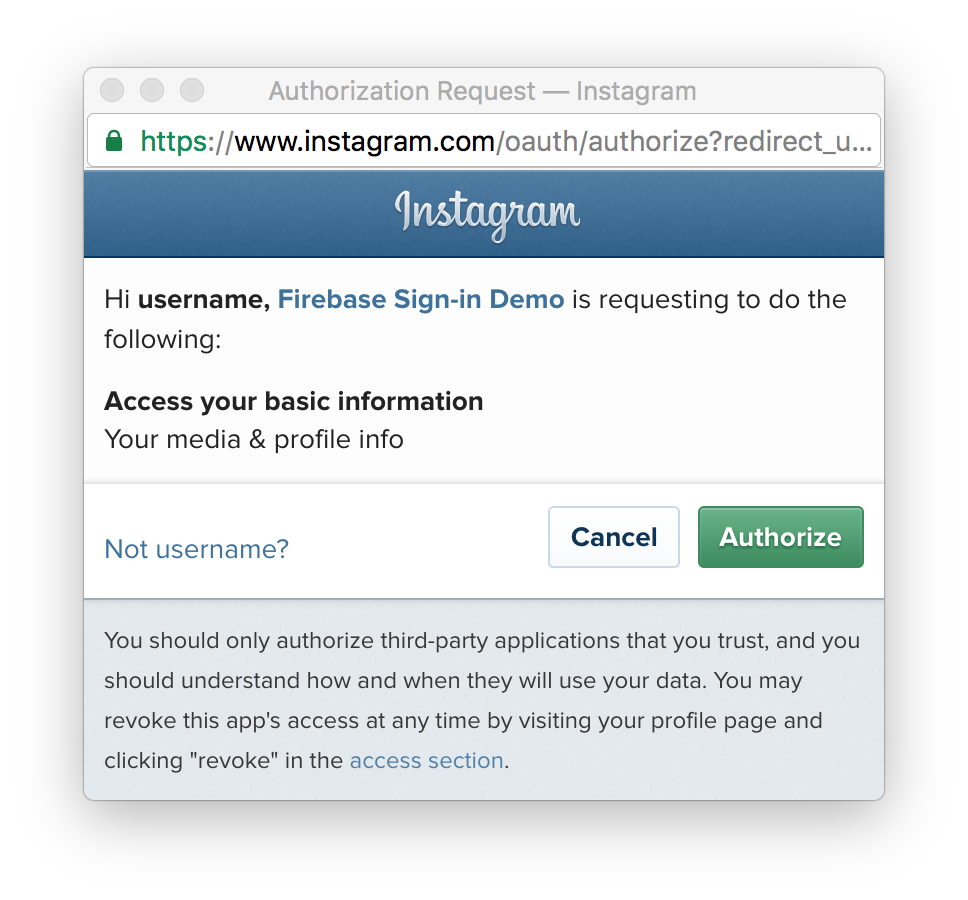
Upon approval the user is redirect back to the /instagram-callback URL handler with an Authorization Code passed in the code URL query parameter and the state value that we passed earlier.
Exchange the Authorization Code for an access token
Once the user has been redirected back to the callback URL we:
- Check that the state cookie is equal to the state URL query parameter.
- Exchange the auth code for an access token and retrieve the user identity from Instagram.
app.get('/instagram-callback',(req, res) => {
  // Check that we received a State Cookie.
  if (!req.cookies.state) {
    res.status(400).send('State cookie not set or expired. Maybe you took too long to authorize. Please try again.');
  // Check the State Cookie is equal to the state parameter.
  } else if (req.cookies.state !== req.query.state) {
    res.status(400).send('State validation failed');
  }

  // Exchange the auth code for an access token.
  oauth2.authorizationCode.getToken({
    code: req.query.code,
    redirect_uri: `${req.protocol}://${req.get('host')}/instagram-callback`
  }).then(results => {
    // We have an Instagram access token and the user identity now.
    const accessToken = results.access_token;
    const instagramUserID = results.user.id;
    const profilePic = results.user.profile_picture;
    const userName = results.user.full_name;

    // ...

  });
});
We’re now done with the OAuth 2.0 specific part of this implementation and what we’ll do next is mostly Firebase specific.
Next we’ll create a Firebase custom auth token and serve an HTML page that will sign the user in using the custom auth token and update the Firebase user profile (more about that later).
app.get('/instagram-callback', (req, res) => {

    // ...

  }).then(results => {
    // We have an Instagram access token and the user identity now.
    const accessToken = results.access_token;
    const instagramUserID = results.user.id;
    const profilePic = results.user.profile_picture;
    const userName = results.user.full_name;

    // Create a Firebase custom auth token.
    const firebaseToken = createFirebaseToken(instagramUserID);

    // Serve an HTML page that signs the user in and updates the user profile.
    res.send(
        signInFirebaseTemplate(firebaseToken, userName, profilePic, accessToken)));
  });
});
Creating the Custom Auth Token
To create a Firebase custom auth token, you’ll need to setup Firebase with a service account credential. This is what gives you administrative privileges required to mint these tokens. Make sure you save the service account credentials file as service-account.json:
const firebase = require('firebase');
const serviceAccount = require('./service-account.json');
firebase.initializeApp({
  serviceAccount: serviceAccount
});
Minting a custom auth token is simple, you just need to choose a uid for the user based on its Instagram’s User ID:
function createFirebaseToken(instagramID) {
  // The uid we'll assign to the user.
  const uid = `instagram:${instagramID}`;

  // Create the custom token.
  return firebase.auth().createCustomToken(uid);
}
Note: Because service account credentials must be kept secure, creating custom tokens should always be done server-side.
Once we have the custom token we can pass it to the client to sign-in into Firebase.
Use the custom token to sign in
At this point the server will serve an HTML page that is ran inside the popup window and will:
- Save the Instagram access token to the Realtime Database in case you need it to access the Instagram API later (Note: make sure you use security rules so that it’s only readable by the user).
- Update the name and profile picture of the Firebase user.
- Sign the user in and close the popup.
One trick is to use a temporary Firebase App instance to update the profile instead of using the default Firebase app. This prevents the Auth listener on your main page to trigger before the user’s profile has been updated:
app.get('/instagram-callback', (req, res) => {

    // ...

    // Serve an HTML page that signs the user in and updates the user profile.
    res.send(
        signInFirebaseTemplate(firebaseToken, userName, profilePic, accessToken)));
  });
});

function signInFirebaseTemplate(token, displayName, photoURL, instagramAccessToken) {
 return `
   <script src="https://www.gstatic.com/firebasejs/3.4.0/firebase.js"></script>
   <script src="promise.min.js"></script><!-- Promise Polyfill for older browsers -->
   <script>
     var token = '${token}';
     var config = {
       apiKey: MY_FIREBASE_API_KEY, // Change this!
       databaseURL: MY_DATABASE_URL // Change this!
     };
     // We sign in via a temporary Firebase app to update the profile.
     var tempApp = firebase.initializeApp(config, '_temp_');
     tempApp.auth().signInWithCustomToken(token).then(function(user) {

       // Saving the Instagram API access token in the Realtime Database.
       const tasks = [tempApp.database().ref('/instagramAccessToken/' + user.uid)
           .set('${instagramAccessToken}')];

       // Updating the displayname and photoURL if needed.
       if ('${displayName}' !== user.displayName || '${photoURL}' !== user.photoURL) {
         tasks.push(user.updateProfile({displayName: '${displayName}', photoURL: '${photoURL}'}));
       }

       // Wait for completion of above tasks.
       return Promise.all(tasks).then(function() {
         // Delete temporary Firebase app and sign in the default Firebase app, then close the popup.
         var defaultApp = firebase.initializeApp(config);
         Promise.all([
             defaultApp.auth().signInWithCustomToken(token),
             tempApp.delete()]).then(function() {
           window.close(); // We're done! Closing the popup.
         });
       });
     });
   </script>`;
}
After the user is signed-in into the default Firebase app inside the popup, the auth state listener will trigger on your main page (remember, with Firebase the auth state is shared across tabs) and voila! You can display the user profile information, use the Realtime Database, Firebase Storage, etc…
Try it out!
We’ve created a demo app which you can try at: https://instagram-auth.appspot.com/

The sample is open source, feel free to have a look at the resources on Github: https://github.com/firebase/custom-auth-samples
What about Android and iOS?
The code shown in this article so far will work for your web apps. There are a few techniques to add Instagram auth to your Android or iOS app and we won’t cover them in this post, but stay tuned!
That’s it!
Let us know in the comments, or using the GitHub repo issues if you are looking for samples for other Identity providers or if you’re having problems integrating with them and we’d love to help!