
Firebase Auth is a secure authentication system that allows users to sign in and sign up for your application. It also allows federated identity sign-in through providers like Facebook, Twitter and of course, Google.
Users expect a rich experience and the the open source FirebaseUI project makes all of this possible by solving complex identity management problems. Firebase UI uses a number of new tools and UX innovations to assist users through the sign-in and sign-up process. These enhancements come from years of research by the Google identity team in learning how to optimize sign-in conversion.
In this post, you’ll see how to use the feature to do sign-in and sign-up in an Android app using both Google Sign-In and an email/password combination.
Getting Started
The best way to get started is to go to GitHub and use FirebaseUI!
You can find FirebaseUI for Android here.
After clicking the Download button, you’ll get a zip file containing the code, as well as a sample app. We’ll explore the sample app in this post to see how you can use FirebaseUI for yourself.
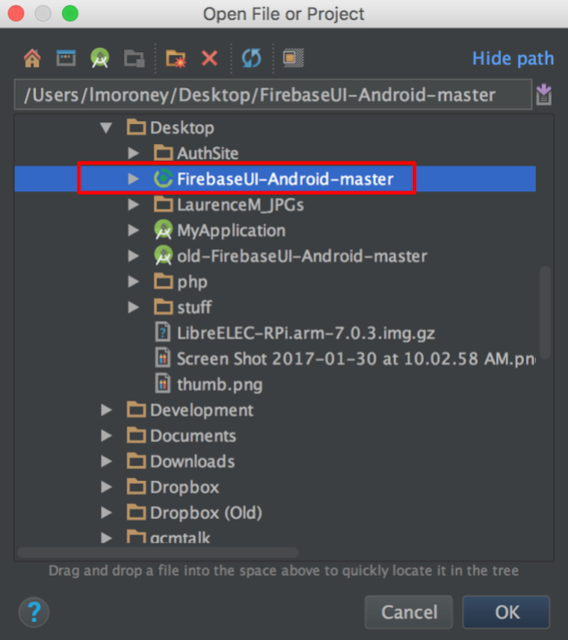
To access it, use Android Studio, and from the File->Open menu, navigate to the directory where you unzipped the code. You’ll see an Android Studio project is available. It should look like this:
Before you can run it, you’ll need a Firebase project in the Firebase console, which in turn will give you a google-services.json configuration file. To get this, follow these steps:
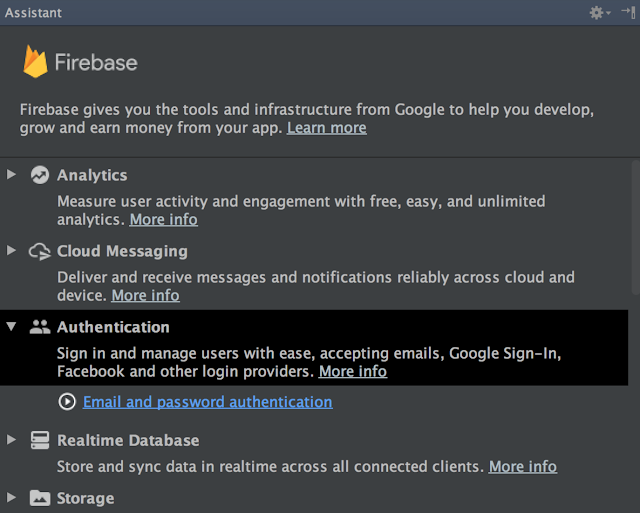
- In Android Studio, click
Tools->Firebase. The Firebase Assistant will open on the right hand side of the Android Studio window. You’ll see an Authentication section, that you can select. It will have an action for ‘Email and password authentication’
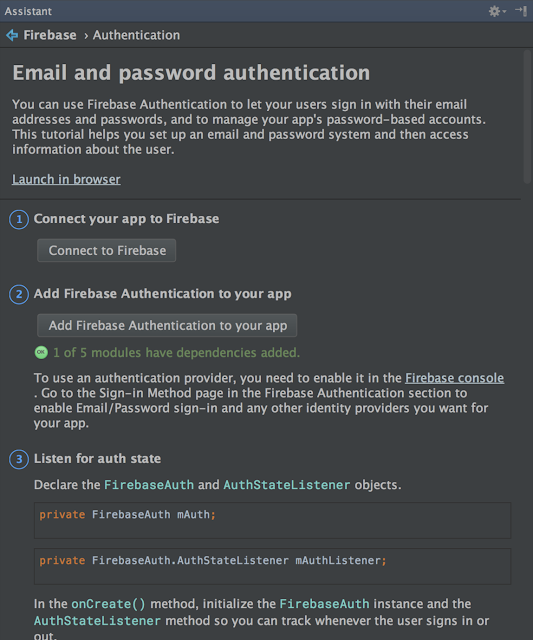
- Click it, and you’ll see some actions that you need to follow. The first of these is to ‘Connect your app to Firebase’.
- Click the button, and you’ll see the ‘Connect to Firebase’ dialog.
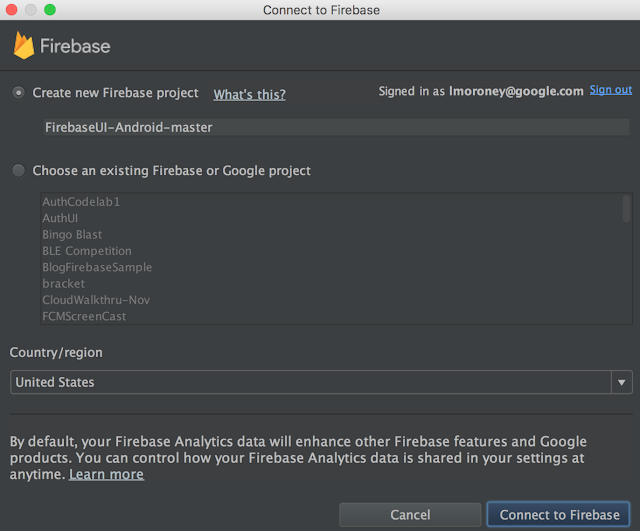
You can select either an existing application, or create a new one as shown. Once you’re done, press the ‘Connect to Firebase’ button.
Android Studio will create a Firebase application for you on the console. It may take a few moments. When it’s done, you’ll see status like this:

Next up, you’ll need to add Firebase Authentication to your app. Note the text, and the link within it – you have to go to the Firebase console, and from there you can set up the desired sign-in methods.
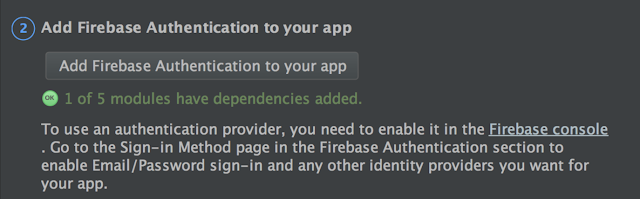
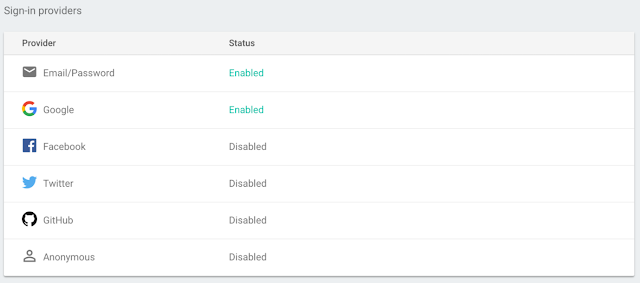
In the console, turn on the Email/Password and Google Sign-In providers. It should look like this:
Now click the ‘Add Firebase Authentication to your app’ button in the assistant, and you’ll see the ‘Add Authentication’ dialog:
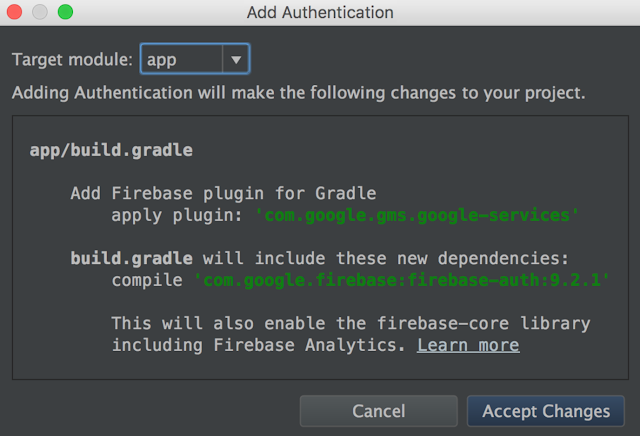
Select ‘Accept Changes’, and Android Studio will add the required libraries to your app. You’re now ready to run it!
Running the FirebaseUI Auth App
You’re now ready to run the app. On some versions of Android Studio, you might get an error telling you that Instant Run isn’t working. If that’s the case, you can disable it on the Android Studio->Preferences->Instant Run menu.
After running, you’ll see this screen:
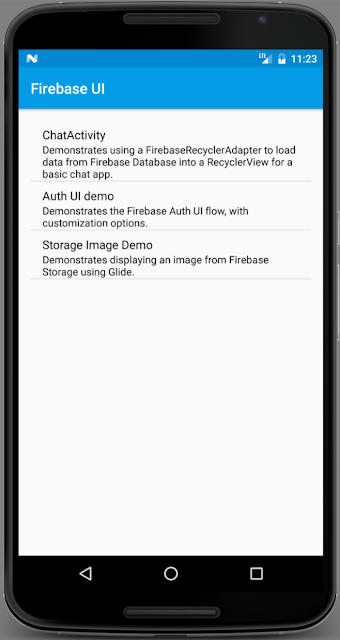
Select ‘Auth UI demo’, and you’ll see this:
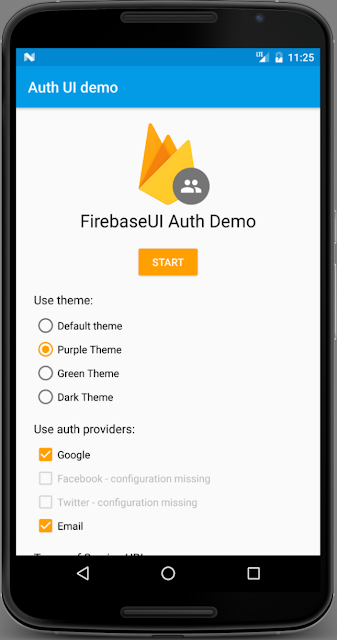
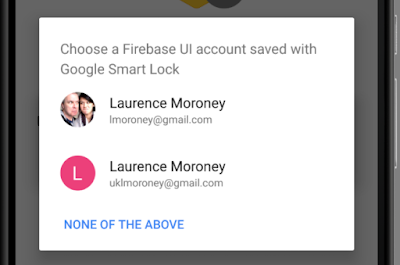
Be sure to leave ‘Google’ and ‘Email’ checked as shown. Try experimenting with them by clicking ‘Start’. You will first see Android’s hint selector, which automatically helps channel the user into either the sign-in or sign-up flow. In thisexample, on my device I have 2 Google IDs signed in on the device (and saved with Google Smart Lock), so when I click ‘Sign In’, I get a card showing both – allowing me to bypass the sign-in screen. The hint selector will also include other accounts on the device as well as any other email addresses saved with Smart Lock for Passwords. If you aren’t signed into Google or any other accounts on the device, you won’t see this, and will get taken to the Sign-in Screen instead. After signing in, you have the option to add the account to Smart Lock, giving you this option.
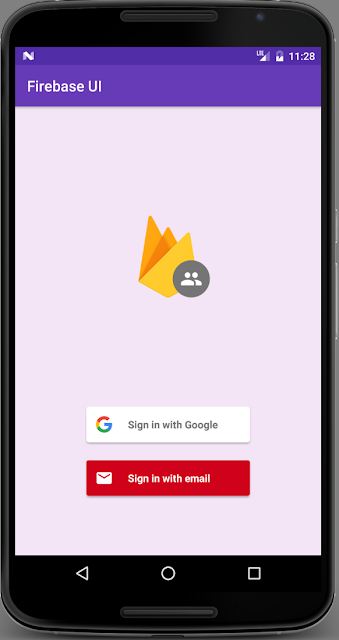
And if I click ‘None of the Above’ – I get my sign-in screen – giving me the option to sign in with Google or sign in with Email.
Think of all the different user flows that you’d need to implement with this.
- If there’s no Google Account, but you sign in with Google, you should have the option to create a new one, or use an existing one
- If there is only one Google Account, and you used it previously to sign in, then you can sign in right away with it.
- If there are multiple Google Accounts, you should be given the option to choose one, add an existing one, or create a new one.
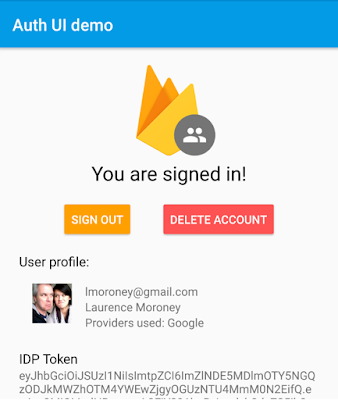
Play with the app and you’ll see all of these are implemented in a standard way. Once you’ve signed in, you’ll see something like this – where metadata about the signed-in user is available:
Remember that the same can apply for Email or other identity provider accounts. That’s a lot of code you’d have to write. But let’s take a look at the code for this app – and you’ll see just how much has been encapsulated for you in FirebaseUI Auth.
Exploring the Code
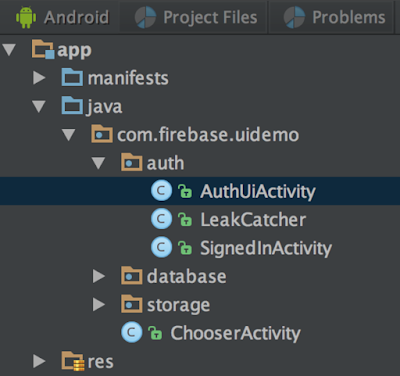
To explore the code, go back to Android Studio, and look in the App folder. In it, you’ll see an ‘auth’ folder, and within that there are three activities.
The first of these, the AuthUiActivity renders the sign-in buttons, and handles the sign-in request and response. The LeakCatcher, as its name suggests, helps you detect memory leaks. Finally the SignedInActivity renders the details of your sign-in session – which you saw above.
Let’s take a look at the AuthUiActivity. In the onCreate method, you’ll see this code:
FirebaseAuth auth = FirebaseAuth.getInstance();
if (auth.getCurrentUser() != null) {
    startActivity(SignedInActivity.createIntent(this, null));
    finish();
}
This gets an instance of the abstract class FirebaseAuth, and if there’s a current user - i.e., if someone is already signed in, then go straight to the SignedInActivity.
While there may be multiple buttons (i.e. Sign In with Google, Sign In with Email etc), there’s only one button control, called _R.id.sign_in_, and it handles the user interaction. So, in your code you should see this:
@OnClick(R.id.sign_in)
    public void signIn(View view) {
        startActivityForResult(
                AuthUI.getInstance().createSignInIntentBuilder()
                        .setTheme(getSelectedTheme())
                        .setLogo(getSelectedLogo())
                        .setProviders(getSelectedProviders())
                        .setTosUrl(getSelectedTosUrl())
                        .setIsSmartLockEnabled(mEnableSmartLock.isChecked())
                        .build(),
                RC_SIGN_IN);
    }
This creates a SignInIntent from the AuthUI class. The logic within handles all of the user flows mentioned earlier! AuthUI is fully open source, so you can inspect how it does it, but if you want to use it, this is all you need to do!
The intent will return an activity result when done, and if this is the result of the above, the request code will be RC_SIGN_IN, so we call the handleSignInResponse function, passing it the resultCode and the data that came back from the intent:
@Override
    protected void onActivityResult(int requestCode, int resultCode, Intent data) {
        super.onActivityResult(requestCode, resultCode, data);
        if (requestCode == RC_SIGN_IN) {
            handleSignInResponse(resultCode, data);
            return;
        }

        showSnackbar(R.string.unknown_response);
    }
This function queries the data that came back from the activity, and if it indicates a successful sign in, then it starts the SignedInActivity, passing it the response data, from where it will parse the user metadata:
  private void handleSignInResponse(int resultCode, Intent data) {
        IdpResponse response = IdpResponse.fromResultIntent(data);

        // Successfully signed in
        if (resultCode == ResultCodes.OK) {
            startActivity(SignedInActivity.createIntent(this, response));
            finish();
            return;
        } else {
            // handle failure conditions
  }
    }
The UI is also fully customizable, and you can see an example of this if you explore the styles.xml file in the project. This allows you to set the colors of the sign in activities provided. Here’s an example of the ‘dark’ theme:
<style name="DarkTheme" parent="FirebaseUI">
        <item name="colorPrimary">@color/material_gray_900</item>
        <item name="colorPrimaryDark">@android:color/black</item>
 …
</style> <item name="colorPrimary">@color/material_gray_900</item>
<item name="colorPrimaryDark">@android:color/black</item>Then, when creating the sign in intent, you can set the theme.
@OnClick(R.id.sign_in)
    public void signIn(View view) {
        startActivityForResult(
                AuthUI.getInstance().createSignInIntentBuilder()
                        .setTheme(R.style.DarkTheme)
                        .setLogo(getSelectedLogo())
Or, as you can see in the snippet above, you can also set the logo – see the getSelectedLogo function for details. It’s as easy as adding your logo to the resources and configuring that function to return it based on its resource id.
And that’s all you need to do! All of the user flows are encapsulated in the AuthUI classes, giving you a high conversion UI for signing in and signing up, freeing you up to focus on your application logic! FirebaseUI is not just on Android. You can get the same easy to drop-in and customize high conversion UI for iOS and Javascript.
You can find the FirebaseUI Auth classes on GitHub at: https://github.com/firebase/FirebaseUI-Android - check them out and get involved!