
Pop quiz, hot-shot! Let’s say you’ve spent some money on two different ad campaigns to bring users into your app. After a few weeks, you discover:
- Ad campaign #1 resulted in 500 clicks.
- Ad campaign #2 resulted in 300 clicks.
So, which ad campaign performed better? Seems like a no-brainer, right? Should you double-down on ad campaign #1?
Well, hang on. What if you were to then discover…
-
Ad campaign #1 resulted in 500 clicks
- But only 80 users installed and opened your app
- …and they spent an average of $1.20 each
-
Ad campaign #2 resulted in 300 clicks…
-
But 230 of those users installed and opened your app
-
…and they spent an average of $6 each
-
…and over 100 of them signed up for your newsletter?
Well, suddenly, that second ad campaign seems like a much better deal, doesn’t it?
That’s the idea behind attribution. It’s a powerful form of app analytics that not only determines which campaigns are bringing you users, but also which campaigns are bringing you valuable users that you care most about.
While attribution is a complex topic that can be studied for many months by people with marketing degrees, let’s give you a brief overview of how it works and what it can mean for your business.
Typically, when an app requests any kind of banner ad or video ad, the network that delivers this ad makes a note of the user’s ID For Advertisers (on iOS devices), also known as the IDFA, or your Advertising ID (on Android devices). These are unique device IDs that serve as a way for an in-app advertiser to remember information about the individual user, while doing so in a way that respects the user’s privacy. They’re not tied to any personally identifiable information, and users have the ability to hide or reset these identifiers if they’d like.
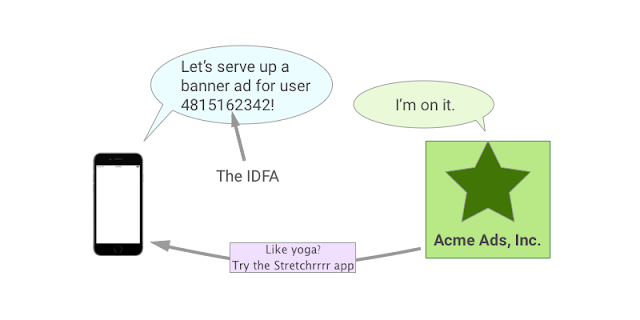
If a user clicks on that advertisement, the network that was serving the ad makes a note on its servers that the user (as identified by this IDFA / Advertising ID) has clicked on it.

Then it sends your user to the appropriate app store so that they can check out your app. Assuming all goes well from here, this user will then install your app from the App Store or Play Store, and open it. Hooray!
Now, let’s say you want to use Firebase Analytics to help track how successful this particular ad campaign is in bringing you valuable users. The way this would work is, on the Firebase Analytics “Attribution” panel, you select what ad networks you’re working with – right now there are about 50 networks that we partner with, and we’re adding more every month.
By filling in some details about your ad campaign, you get back a Campaign URL, which you can then send on to the original advertiser.
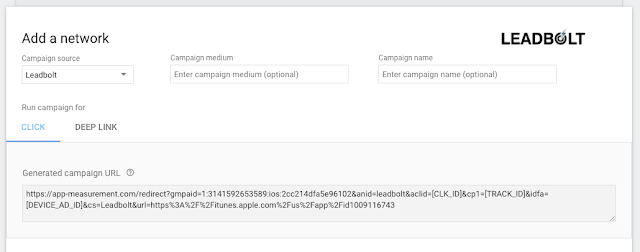
The information shared about the ad network is generally broken up into three parts – the source, the medium, and the campaign. Different networks like to record this information in slightly different ways, but you can think of them as generally hierarchical categories.
- The source is typically the ad network itself. (Vungle, AdWords, etc.)
- The medium generally records the type of ad that was shown. (In game banner, full-screen interstitial video, etc.)
- The campaign usually identifies the specific ad campaign that was being run. (Elevator fight, Swimsuit model on a horse, etc.)
With this new URL, the advertising network can let Firebase know that the user clicked on one of their ads before redirecting them to the App / Play Store.
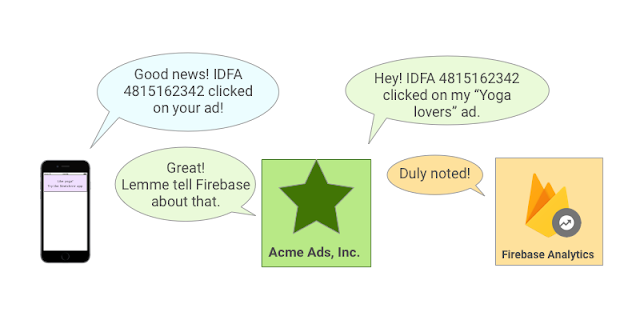
From that point on, when a user performs important events in the app that you have designated as Conversion Events – things like opening the app for the first time, making a purchase, or sharing the app with their friends – Firebase Analytics will also note what ad campaign was responsible for bringing you this user.
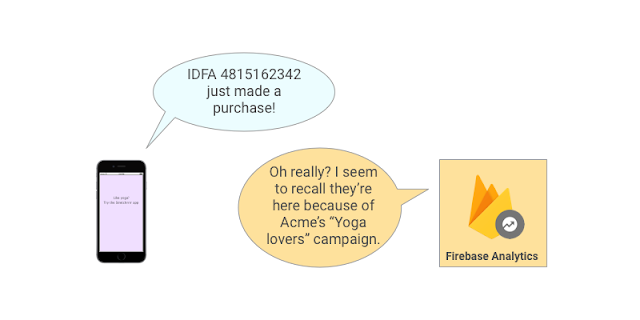
You’ll then be able to filter those events within Firebase Analytics by any of these ad campaign parameters. For instance, you can see what ad network is responsible for giving you the most overall users, by looking at the attribution reports for your first_open event.
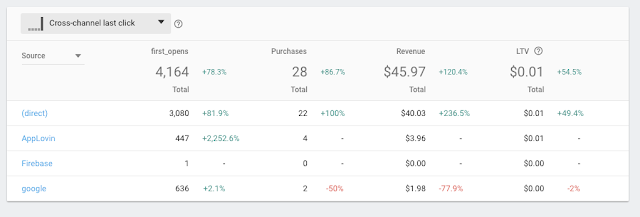
You can also see what particular ad campaign is responsible for giving you the most money in an in_app_purchase event, or which ad network gives you users who have clicked your “Yes, I’ll review your app!” button. Whatever you can track in a Firebase Analytics event, you can designate as a conversion event.
Postbacks
In addition to receiving attribution information from these ad networks, Firebase Analytics can report back information to these ad networks, in a concept known to most marketing professionals as “completing the circle of life”. Actually, nobody calls it that; I just made it up. (But it sounds good, right?) You can ask Firebase to tell these ad networks that a user has completed an important conversion event within your app, which is done via a call known as a Postback.
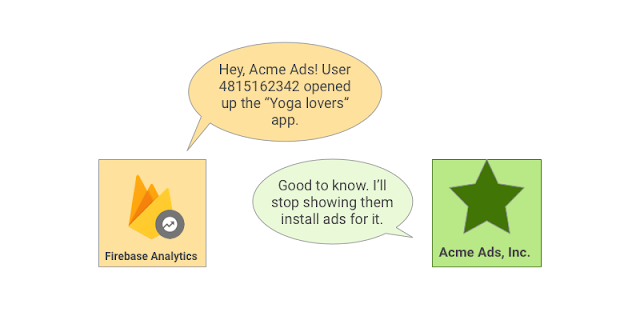
For instance, if your app were to report back to an ad network that a particular user (as identified by their IDFA / Advertising ID) has gone ahead and opened your app for the first time, that ad network could take advantage of this information to improve its own offerings in a couple of ways. For starters, it now knows that this user has installed your app, so it can stop showing them ads for an app they’ve already installed. It might also use this information to determine what kinds of apps this user might enjoy in the future.
Setting up a postback in Firebase Analytics is fairly easy. You’ll use the Firebase console to determine which conversion events you want to post back to the network, and usually add a little information specific to that advertising network.
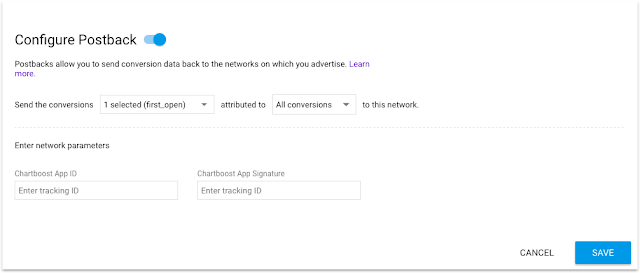
You’ll also have the option of posting all of your conversion events back to this network, or just the ones that came from this original network. Posting back all conversion events means you’ll be doing a better job of training all of your ad networks, and Firebase takes some time to anonymize the other ad networks involved before sending it over. So an ad network might find out that a particular user completed a conversion event in your app, but it won’t know which competing ad network was responsible for it.
What about Dynamic Links?
So you might have noticed that when you use Firebase Dynamic Links, there’s also a space for you to set up tracking parameters with a source, medium, and campaign name. Gosh, sounds awfully familiar, right?
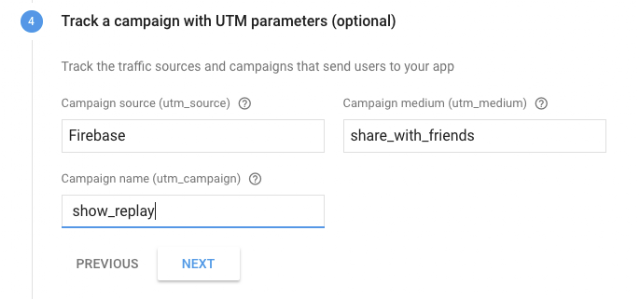
Well, in the same way you can measure the effectiveness of ad campaigns with Firebase Analytics, you can also measure the effectiveness of Firebase Dynamic Links. By adding these tracking parameters to your Dynamic Links, Firebase Analytics can treat them like any other campaign it’s measuring attribution reporting for, and you can view conversion events not just by the ad campaigns responsible for bringing in those users, but also by which Dynamic Links might have brought them in.
It’s worth noting, however, that Firebase Dynamic Links works best when used in non-marketing contexts – actions like user-to-user sharing, directing users to your app from your website, or linking to your app in social media posts. If you want to measure the effectiveness of an advertising campaign, you should stick with the traditional methods that these ad networks have already set up and use the Campaign URLs that Firebase provides for you.
Give it a try!
So that’s the general overview of attribution information in Firebase Analytics. If you haven’t yet tried it within your app, I encourage you to give it a try. You might learn something surprising about those ad networks you’ve been spending your money on.