
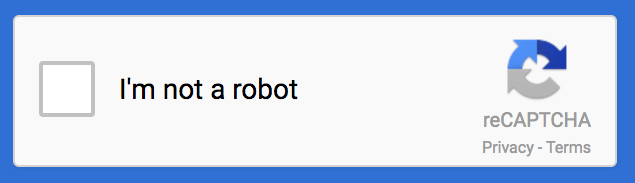
If you’ve browsed the web at all, you’ve probably seen some sites that ask you to prove you’re a human by presenting a reCAPTCHA challenge. For example, if you try to use the goo.gl URL shortener, it won’t let you shorten a link until you satisfy the reCAPTCHA, which looks like this:
Web site engineers do this to protect their site from spam and abuse from bots, while allowing legitimate human use. Why is protection needed? Maybe you have some backend code that’s expensive in time and storage and you only want actual users of your web to access it.
If you have a web site, you can also use reCAPTCHA to protect its services. And, if you’re building your site with Firebase Hosting, it’s pretty easy to get it integrated with the help of Cloud Functions for Firebase to provide a secure, scalable backend to verify the completion of the reCAPTCHA.
Getting started
In this blog post, I’ll walk you through a few steps that will get you to a very basic integration that you can extend later for your own site. For this walkthrough, I’m assuming you already have some experience with web development, the Firebase console, and the Firebase CLI.
1. Create a Firebase project in the console
Navigate to the Firebase console and create a new project. There’s no need to add billing to this project - you can experiment fully without providing a credit card. Once you create the project, there’s nothing else you need to do in the console.
2. Set up a directory for your project code
Using the Firebase CLI, make sure you’re logged in with the same Google account that you used to create the project:
$ firebase loginNow, create a root project directory and initialize it:
$ mkdir my_project
$ cd my_project
$ firebase init
When running firebase init, be sure to select both hosting and functions. When you’re asked to choose a project, select the one you just created earlier. Take the defaults for every other prompt. You’ll end up with a directory structure that contains a public folder for web content, and a functions folder for your backend code.
For the Cloud Functions backend, we’ll need a couple modules from npm to help verify the reCAPTCHA. The reCAPTCHA API requires you to make an HTTP request for verification from your backend, and you can do that with the request and request-promise modules. Pull them into your project like this:
$ cd functions
$ npm install request request-promise
Your package.json file should now show those two new modules in addition to firebase-functions and firebase-admin.
3. Test web deployment
Make sure you can deploy web content by running this deploy command:
$ firebase deploy --only hostingWhen this finishes, you’ll be given the public URL to your new web site, which will look something like this:
✔  Deploy complete!

Project Console: https://console.firebase.google.com/project/your-project/overview
Hosting URL: https://your-project.web.app
where your-project is the unique id that was given to your project at the time it was created in the console. If you paste the Hosting URL into your browser, you should see a page that says “Firebase Hosting Setup Complete”.
4. Get a reCAPTCHA API Key
reCAPTCHA requires a couple API keys for operation, one for the web client and one for the server API. You can get those from the reCAPTCHA admin panel, so navigate there. Create a new site and give it a name. Select “reCAPTCHA V2”. For domains, put the full hostname of your Firebase Hosting site name (e.g. “your-project.firebaseapp.com”).
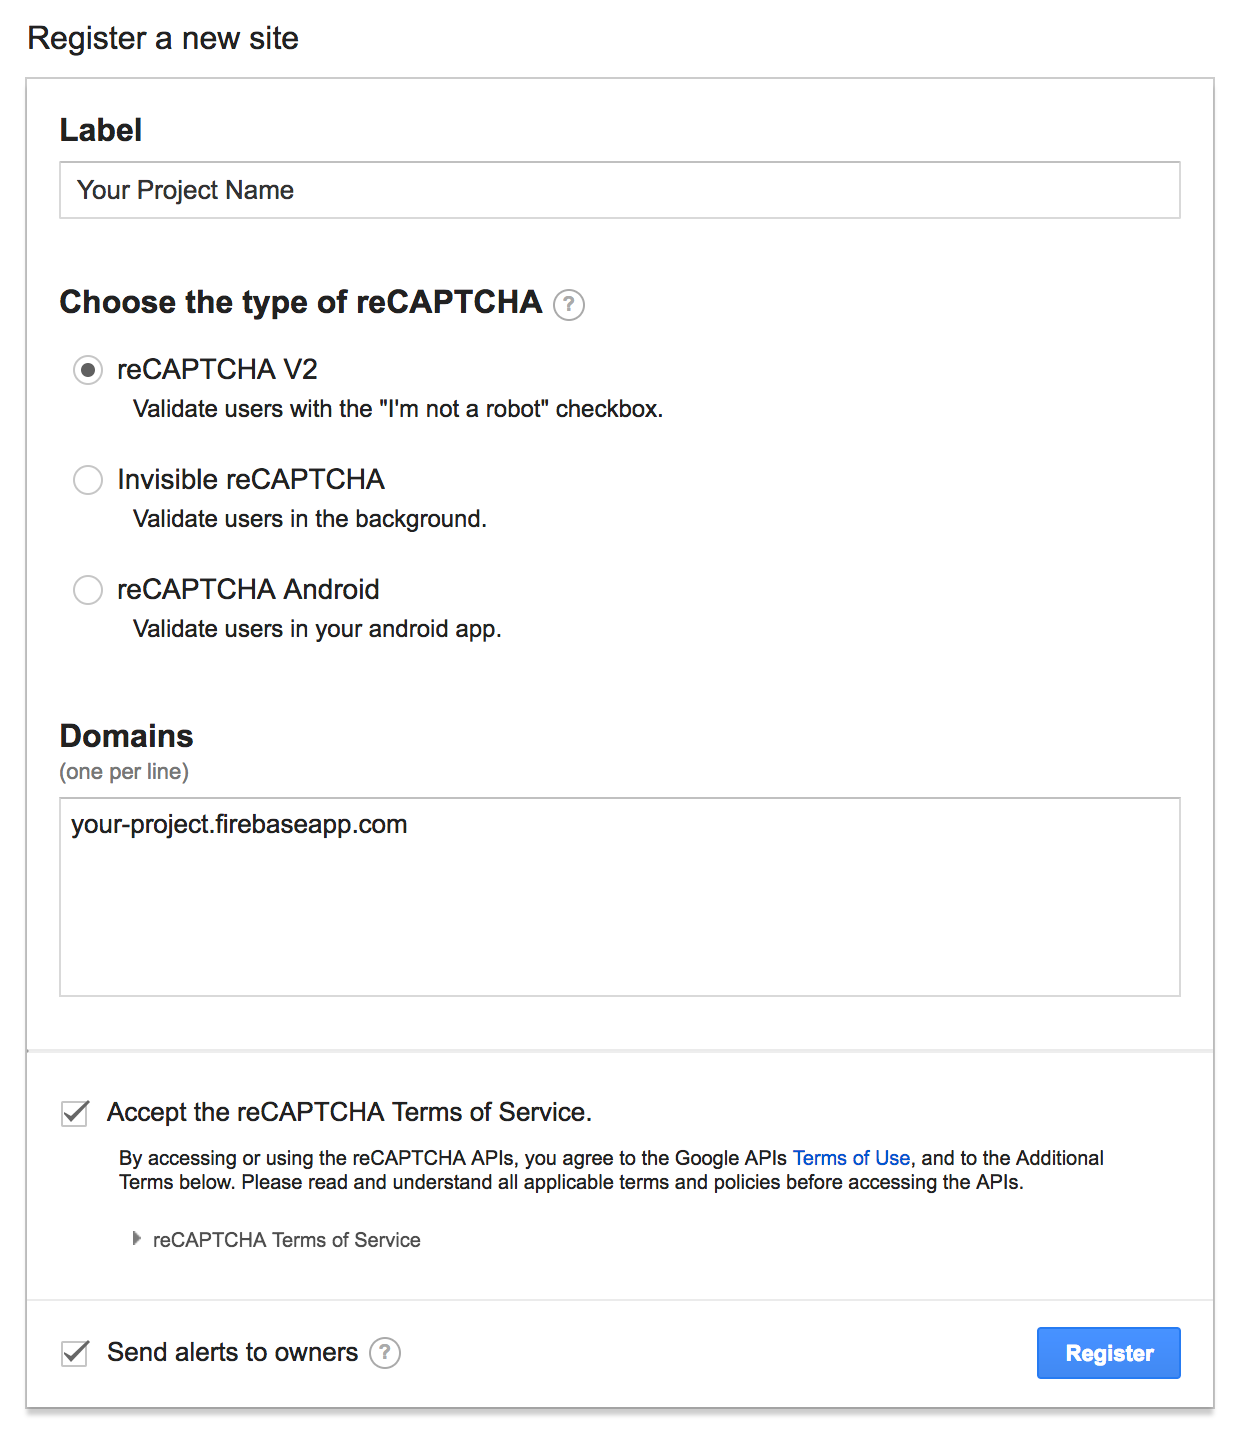
After you register, you’ll be given a Site key and a Secret key. The Site key will be used in your frontend HTML, and the Secret key will be used in your backend hosted by Cloud Functions.
5. Add a page with a reCAPTCHA
Now we’ll add a new HTML page to display the reCAPTCHA. In the public directory in your project, add a new HTML file called recaptcha.html to display the reCAPTCHA. Simply copy and paste the following content directly into that new file:
<html>
  <head>
    <title>Firebase + reCAPTCHA</title>
    <script src="https://www.google.com/recaptcha/api.js" async defer></script>
    <script type="text/javascript">
    function dataCallback(response) {
        console.log("dataCallback", response)
        window.location.href = "/checkRecaptcha?response=" + encodeURIComponent(response)
    }
    function dataExpiredCallback() {
        console.log("dataExpiredCallback")
    }
    </script>
  </head>
  <body>
    <div class="g-recaptcha"
      data-sitekey="PASTE_YOUR_SITE_KEY_HERE"
      data-callback="dataCallback"
      data-expired-callback="dataExpiredCallback"/>
  </body>
</html>
Notice in the body there is a div with the class “g-recaptcha”. The first thing you should do here is copy your reCAPTCHA site key into the div’s data-sitekey attribute value. This div will get automatically transformed into a reCAPTCHA UI after the first script at the top is loaded. You can read more about that here in the docs.
You can see it right away if you firebase deploy again, then navigate to /recaptcha.html under your Hosting URL. Don’t bother dealing with the reCAPTCHA yet, because we still need some backend code to complete the verification!
The JavaScript code in this page defines two functions dataCallback and dataExpiredCallback. These are referenced in the div, and provide callbacks for the reCAPTCHA to tell you when the reCAPTCHA has been satisfied, or if the user took too long to proceed.
The important thing to note in dataCallback is that it redirects the browser to another URL in the site with the path /checkRecaptcha, and pass it a parameter named response. This response string is generated by reCAPTCHA and looks like a random collection of characters.
The path /checkRecaptcha in your web site obviously doesn’t exist yet, so we need to create a Cloud Function to validate the response string it’s going to receive.
6. Create a Cloud Function to verify the reCAPTCHA response
In the functions directory in your project, edit the existing index.js file. This has some sample code, but you can delete it. In its place, paste the following JavaScript code:
const functions = require('firebase-functions')
const rp = require('request-promise')

exports.checkRecaptcha = functions.https.onRequest((req, res) => {
    const response = req.query.response
    console.log("recaptcha response", response)
    rp({
        uri: 'https://recaptcha.google.com/recaptcha/api/siteverify',
        method: 'POST',
        formData: {
            secret: 'PASTE_YOUR_SECRET_CODE_HERE',
            response: response
        },
        json: true
    }).then(result => {
        console.log("recaptcha result", result)
        if (result.success) {
            res.send("You're good to go, human.")
        }
        else {
            res.send("Recaptcha verification failed. Are you a robot?")
        }
    }).catch(reason => {
        console.log("Recaptcha request failure", reason)
        res.send("Recaptcha request failed.")
    })
})
The first thing you should do here is paste your reCAPTCHA secret key from the registration site in place of PASTE_YOUR_SECRET_CODE_HERE.
(Astute readers may note that the reCAPTCHA API endpoint host is “recaptcha.google.com”, while the docs say “www.google.com”. This is OK! You have to use recaptcha.google.com as shown in order to make the call on the Spark plan, because that host has been whitelisted for outgoing traffic from Cloud Functions.)
This code defines an HTTPS function that, when triggered, will make another HTTPS request (using the request-promise module) to the reCAPTCHA API in order to verify the response that was received in the query string. Notice that there are three cases with three different responses to the client. Either:
- The reCAPTCHA verifies successfully (the user is human)
- The reCAPTCHA fails (could be a robot)
- The API call fails altogether
It’s important to send a response to the client in all cases, otherwise the function will time out with an error message in the Firebase console log.
To deploy this new function (and the web content at the same time) run the following command:
$ firebase deployYou’ll notice in the output that the function is assigned its own URL, which looks something like this:
https://us-central1-your-project.cloudfunctions.net/checkRecaptchaThis is clearly a different host than the one with your web content. However, what we really want instead is for the function to be referenced through your web host at a URL that looks like this:
https://your-project.firebaseapp.com/checkRecaptchaThis makes the function look like it’s part of your web site. With Firebase Hosting a Cloud Functions, this can be done!
7. Add rewrites to map a hosting URL to a Cloud Function
Edit the file firebase.json in the project root directory and paste the follow JSON configuration as its contents:
{
  "hosting": {
    "public": "public",
    "rewrites": [
      {
        "source": "/checkRecaptcha",
        "function": "checkRecaptcha"
      }
    ]
  }
}
What you’ve done here is add a new section for rewrites, and you can read more about those in the docs. Specifically what this does is allow access to the URL path /checkRecaptcha invoke the function called checkRecaptcha that you pasted into your functions/index.js file.
Remember that the JavaScript code in recaptcha.html redirects to this path when the reCAPTCHA is satisfied by the user, so this effectively sends to user to the function after they complete the reCAPTCHA.
Now do one final deploy to send everything to Firebase:
$ firebase deploy8. Test the reCAPTCHA!
Navigate to /recaptcha.html under your hosting URL, then solve the reCAPTCHA. It may ask you to identify some cars or roads in a set of pictures. Once you’ve satisfied the reCAPTCHA with your humanity, the JavaScript in your HTML should redirect you to your function, which verifies with the server that you’re indeed human, and you should see the message “You’re good to go, human.”
That’s all
This example of how to use reCAPTCHA with Cloud Functions for Firebase is much more simple than what you’d probably do in your own web site. You have several options for how to send the reCAPTCHA response to your function, and you’d obviously want to provide something more useful than a message to the user. But this should get you started protecting your web content from abuse from bots.