

Notifications are all about getting the user’s attention at the right place and at the right time, leading them to the most important places in your app. Having richer content in your notifications can make them stand out to your users, and increase the chances that they engage with your app. In this blog post, we’ll discuss several ways to make your notifications more interesting to your users by:
- Including images into your notifications
- Using new notification parameters available for Android users
Recently, the Firebase Cloud Messaging team added image support for notifications on both iOS and Android platforms. We’ve also added 12 parameters on Android which let you easily craft fun and rich notifications with minimal effort.
Adding images to your notifications
You can now add images to your notifications, as shown in the figure below. These can help make your notifications a lot livelier, and provide a visual context for your notification that can match with your app. For example, if you’re developing a video streaming app, a notification that includes movie poster images for new releases could be a great way for your notification to get more attention. If you’re an e-commerce app developer, notifying your user with the picture of the product they’ve been waiting for could help encourage them to make the purchase.
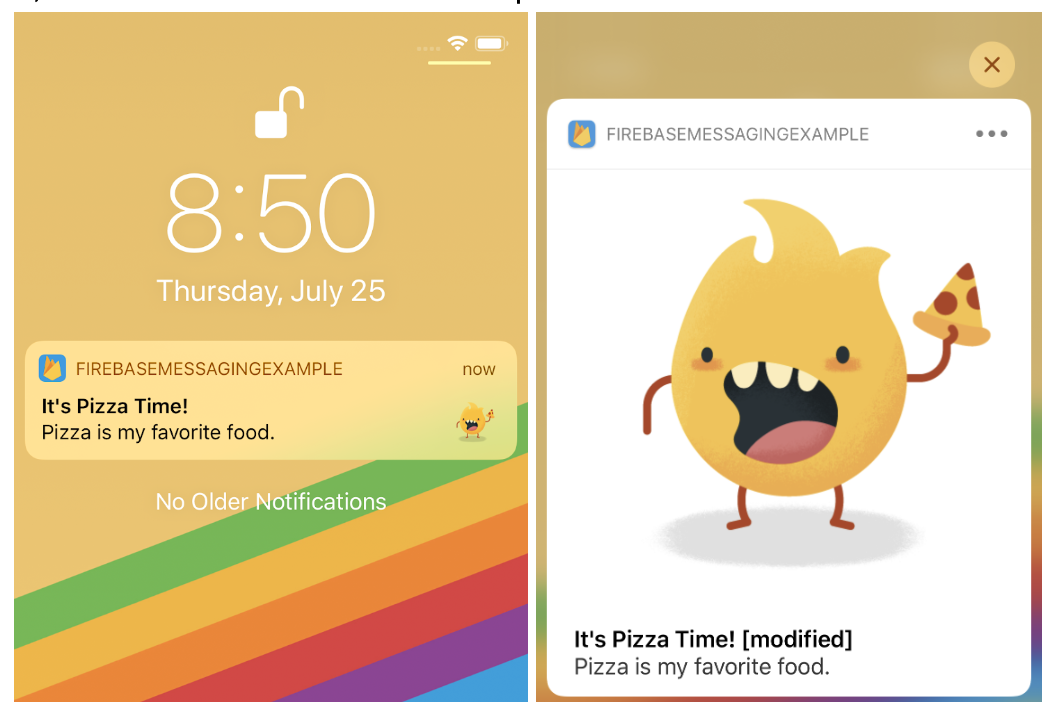
Figure 1: Image notifications on iOS platform
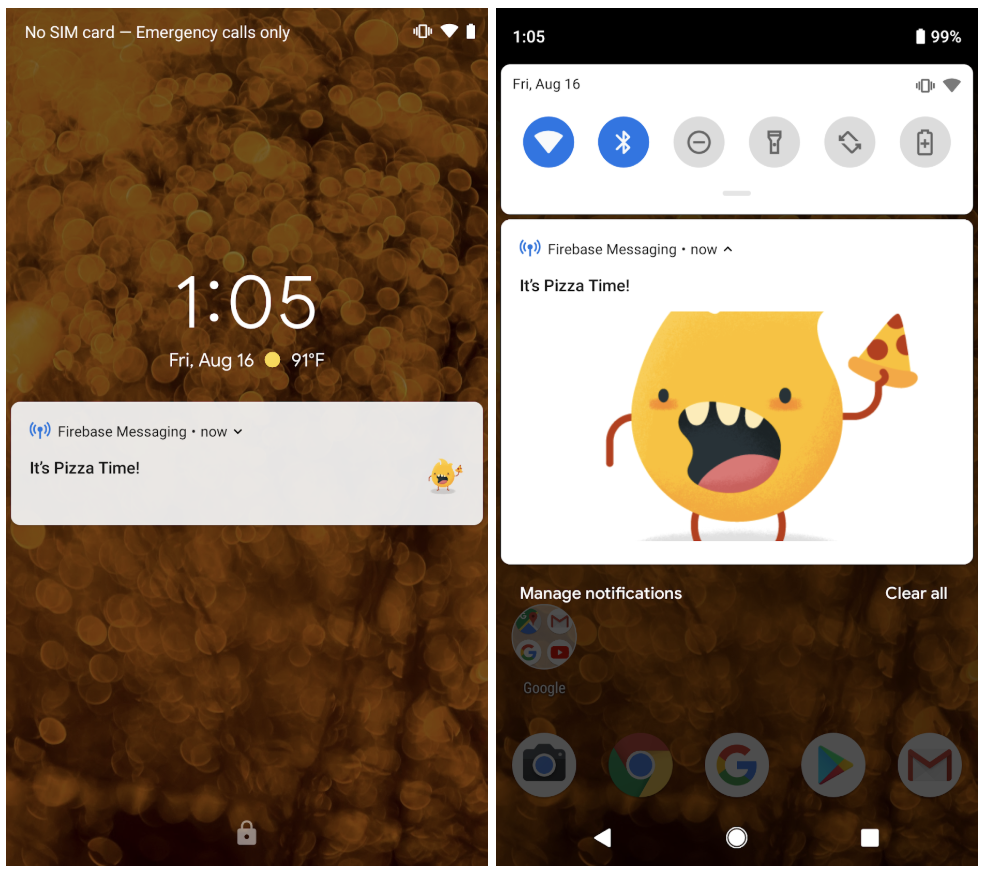
Figure 2: On Android, images show up in both the notification tray when your notification is expanded, as well as when that notification is opened.
How to send notifications with images
1. Draft a notification with an image URL
The first thing you need to do is to prepare a notification with an image URL. From the Firebase console, you’ll be presented with two options when you are composing a notification:
- Option 1 - You can enter a URL to the image you want to use;
- Option 2 - You can upload a local image directly to your notification composer.
If you are using the HTTP v1 API, you will need to provide a public URL to the image parameter in the JSON body for the notification you’re sending. If you like, you can use Cloud Storage for Firebase to upload an image and get a public URL for the image from there.
When you copy and paste the public image URL or upload your image directly to the notification composer, the newly updated notification composer will render a preview of the image on the notification for each platform, as shown in Figure 3.
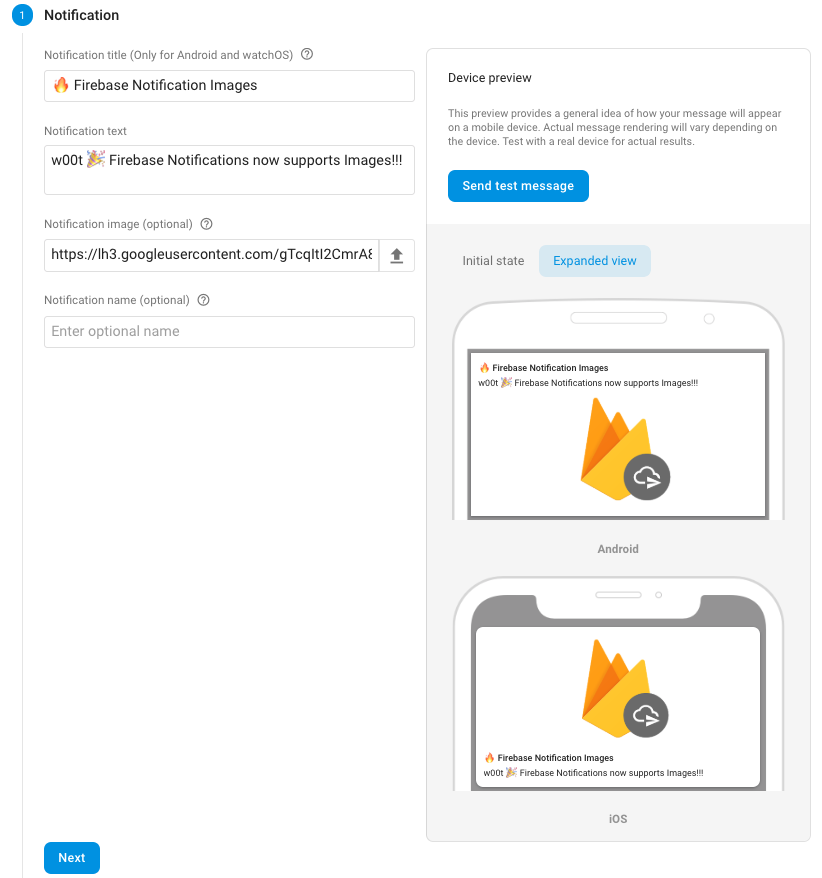
Figure 3: The newly updated notification composer helps you easily visualize the image layout for your notifications
2. Download the latest SDKs
Download the latest Messaging SDKs for Android and iOS and rebuild your app with the new dependencies. When a notification that includes an image URL is delivered to the device, the messaging SDK will download the image and attach it to the notification. If the image cannot be downloaded due to the size of the image or availability of the network, the FCM client will display the notification without rendering the image.
Note that in order to send notifications with images or other media files on iOS, you will need to enable service extensions for the iOS platform. We’ll cover that next. If you are an Android developer, you’re already all set for sending notifications!
3. Call the new Messaging ExtensionHelper API
To receive notifications with media files in iOS, you will need to add a Notification Service Extension target in your project. The extension is available starting from iOS 10+ and supports media files like images, videos and gifs! To use videos and gifs, you will have to upload them to Cloud Storage for Firebase first and copy and paste the public URLs of those files in the Notification composer, or to the JSON image parameter in the HTTP v1 API.
When a notification is first received on a client device, the Notification Service Extension intercepts the message and allows developers to modify it before it becomes visible to users. At this point is when you will call the Firebase Messaging ExtensionHelper API to let the iOS SDK handle downloading and attaching the media files for you. Keep in mind, the processing time available for a service extension is short-lived, so if the media file is too big to download or process, the client might not complete attaching it to the notification before it is sent. When network availability is limited or slow, or the image is too large, the service extension might simply complete without an image included since it wasn’t able to finish downloading it.
You can follow these steps in Apple Documents to create a notification service extension target. Next, modify the last call in didReceiveNotificationRequest:withContentHandler: by doing the following: instead of completing it with the contentHandler(self.bestAttemptContent), call the FIRMessaging extensionHelper API. This will allow the Messaging SDK to handle downloading the image and completing the handler for you.
@interface NotificationService () <NSURLSessionDelegate>
@property(nonatomic) void (^contentHandler)(UNNotificationContent *contentToDeliver);
@property(nonatomic) UNMutableNotificationContent *bestAttemptContent;
@end

@implementation NotificationService

- (void)didReceiveNotificationRequest:(UNNotificationRequest *)request withContentHandler:(void (^)(UNNotificationContent * _Nonnull))contentHandler {
    self.contentHandler = contentHandler;
    self.bestAttemptContent = [request.content mutableCopy];

    // Modify the notification content here as you wish
    self.bestAttemptContent.title = [NSString stringWithFormat:@"%@ [modified]",
    self.bestAttemptContent.title];

  // Call FIRMessaging extension helper API.
  [[FIRMessaging extensionHelper] populateNotificationContent:self.bestAttemptContent
                                            withContentHandler:contentHandler];

}
Code sample on how to call FIRMessaging extensionHelper API to attach image to your notification.

Figure 4: An example of a gif notification received on iOS platform.
5. Start sending notifications with images!
That’s it! Go ahead and start sending notifications with some fun images!
Enhance your notifications using new additional parameters for Android
Firebase Cloud Messaging now gives you more options to enhance notifications and do things like enabling the default sound and vibration pattern, controlling whether your notifications show on locked screens or not, and more. To enable these features, you’ll just need to add additional parameters to your notifications using the HTTP Send API. Below are all the new parameters we’ve introduced in this release. You can check which Android API levels support which parameter features by checking out the documentation here.
{
  "ticker" : "this is a ticker text",
  "event_time": "2000-01-01T00:00:00Z",
  // dismiss on click
  "sticky": false,
  // won't show on bridged devices such as Android wear watches. Only show on target device
  "local_only": true,
  // require the user's prompt attention. Ex: earthquake alert
  "priority": "PRIORITY_MAX",
  // vibrate pattern being off 1s, on 1s, off 4s, 8s
  "vibrate_timings": ["1s", "2s", "4s", "8s"],
  // won't show on a locked screen. Ex: no show on direct booted devices
  "visibility": "VISIBILITY_PRIVATE",
  "light_settings":
    "color": {
      "red": 0.2, // amount of red in the color
      "green": 0.4, // amount of green in the color
      "blue": 1  // amount of blue in the color
      "alpha": 0.8 // almost solid color
    },
    "light_on_duration": "1s",
    "light_off_durtaion": "2s"
  }
}
Let’s look at some new possibilities and use cases for different notifications using these new parameters!
Notifying about an event? Set a time!
Often, developers send notifications that inform users about events with an absolute time reference, like a limited-time sale a concert date. However, the time that the notification actually gets delivered may not always match up with the event time for the content of that notification. For instance, let’s say a short-lasting Firebase pizza sale notification is delivered to a device in airplane mode. When the device regains connectivity, the notification will be displayed with a timestamp of the time the notification was received as the device got back online. That received notification time will be misleading if the sale has already expired, leaving the user misinformed.
By default, notifications are time-stamped with the system time at the moment they are received on the device. If they are not the time value you wish to have for your notifications, you can override the timestamp value by setting event_time. In addition, setting event_time can be useful since notifications are sorted in the notification drawer by the event time indicating when they were received. For example, if you’re a sports app developer and send play by plays for major games via notifications to your users, you’ll want these to show up in chronological order in the notification tray for your users. Setting event_time will help you accomplish just that.
Note that to represent a point in time independent of any time zone or calendar, we use the UTC Epoch time defined by the Timestamp object.
Set notification vibrate pattern and lights to brand your product
Most modern Android devices have vibration capabilities and some have LED lights that can be used for notifications. These can provide physical and visual cues for your customers to distinguish your app from others. You can set both settings with the light_settings and vibrate_timings parameters.
If you want to set a sound and vibrate pattern for a notification without spending a lot of time configuring it, just set defaultSound and defaultVibrateTimings to true and you’ll be set to go.
Something Important happening? Set a high priority!
Like all other information, notifications have varying levels of importance.The higher the importance of a notification, the more prioritized and interruptive notifications will be. You can set notification importance by setting notification_priority.
Note that notification_priority is different from AndroidMessagePriority. The former one controls the UI behavior of the notifications on the device. The latter one is an FCM concept that controls when the message is delivered. See FCM guides for more information.
Private notification? Hide it from lock screen.
Some notifications may carry sensitive content. As a developer, you might want to control the level of visibility for notifications posted by your app on a secure locked screen. Now you can set visibility to control how notifications are displayed on a locked screen.
Figure 5. Notifications on the lock screen with sensitive content hidden
Set custom notification count
By default, each notification received for your app increments a notification number displayed on the long-press menu for your app launcher icon, but you can override this number for your app. For example, this might be useful if you’re using just one notification to represent multiple new messages but you want the count here to represent the number of total new messages. You can set the notification count by setting the field of notification_count.
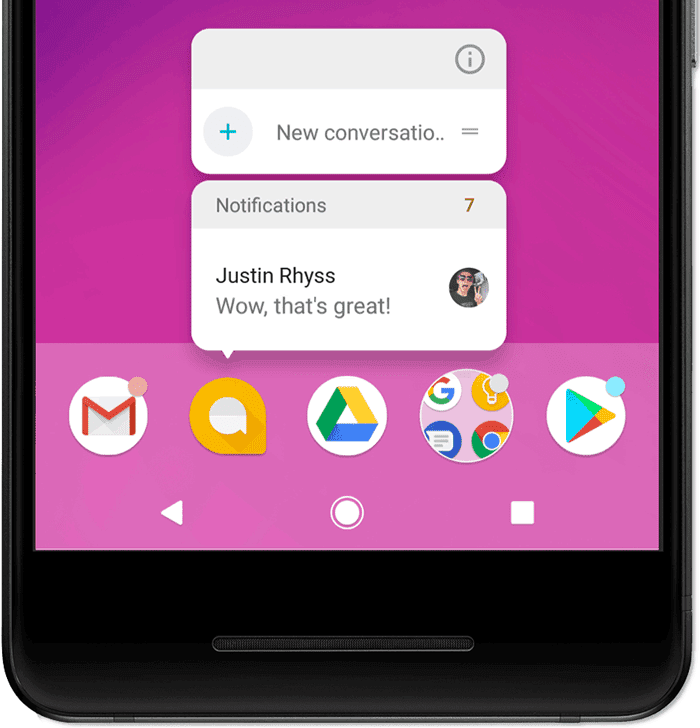
Figure 6 Notification badges and the long-press menu with notification count
Try it out!
We highly recommend that you start incorporating images into your notifications to make them richer and more engaging on iOS and Android, and enhancing them even further with notification parameters for Android ! As always, if you have any questions or feedback from us, please reach out on StackOverflow or our official support page.