If you read this blog, chances are you’re a fan of Firebase and the power it gives developers to build incredible products. At Flamelink we’ve used it extensively to build websites, apps and other digital platforms for clients of our agency. Firebase helps take your app from proof of concept to production quickly and easily.
While Firebase backend services like Realtime Database and Cloud Firestore are a great experience for developers, we have struggled to hand over full control to some of our less-technical clients. We found they weren’t comfortable editing data directly, so we were inundated with requests to do small content updates.
We tried many different solutions to make it possible for our clients to update their content - from hard-coding content on the frontend, to syncing Firebase with Google Sheets, and everything in between. We even tried coaching our non-developer clients on how to update content in the Firebase console, but the console was just too powerful for their needs.
So we created Flamelink, a headless Content Management System (CMS) built specifically for Firebase which supports both Cloud Firestore and the Realtime Database. Flamelink allows developers to leverage the power of Firebase and the Google Cloud Platform while giving non-developers an intuitive interface to manage their content.
In this tutorial, we’ll show you how to connect Flamelink to your Firebase project, and quickly get started building an app with Angular, Firebase and Flamelink. As with any Firebase project, you’re not limited to JavaScript, you can use any of the languages that Firebase supports.
A special thanks to our friend Erik Slack for providing this repo of example code to help you get started. You can find him on GitHub, LinkedIn or Twitter.
For the purposes of this tutorial, we’ll be creating a Bedtime Stories app, using long and short story examples to help illustrate how Flamelink can help you manage your content. You can clone the repo by running:
git clone https://github.com/erik-slack/Angular-Flamelink-Firebase.git Let’s get started!
The Steps
Step 1: Create a Firebase project
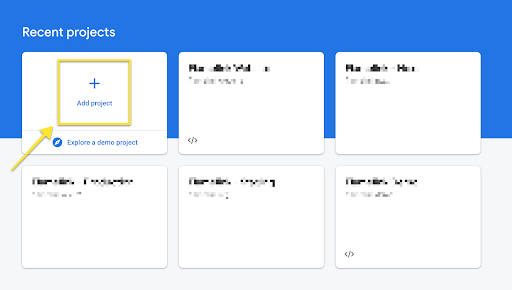
If you haven’t already, go to the Firebase console and sign in. Once you’ve done that, you’ll want to select “Add project” and enter a name for your app.
Once you’ve done this, you’ll be asked a few more questions. For the purposes of this tutorial the choices you make won’t matter. After you answer those questions your new Firebase project will be ready!
Step 2: Configure Firebase
In this step, we’ll be configuring Firebase Authentication and Security Rules. This is to ensure that you can create, read and update content or files via the Flamelink interface.
First, in the Authentication section of the Firebase console, enable your prefered sign-in methods. You’ll need to configure this to log into your Firebase project via the Flamelink interface.

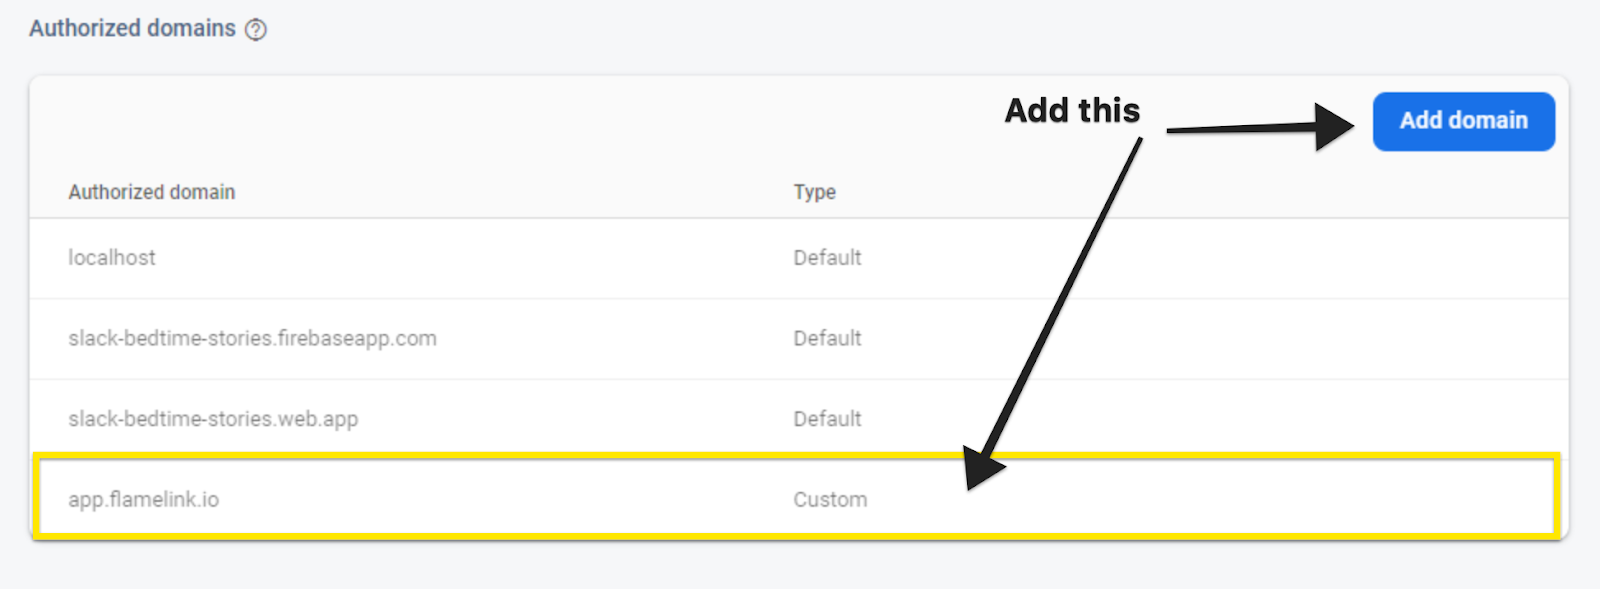
Then, confirm your authorized domains. Be sure to add the app.flamelink.io domain. This step allows your project’s Firebase Authentication to be used directly by Flamelink.
Next we’ll need to configure the Security Rules. In this tutorial, we’ll be using Cloud Firestore, so look for the Firestore section in the side-panel, create a database if necessary, and then select the Rules tab.
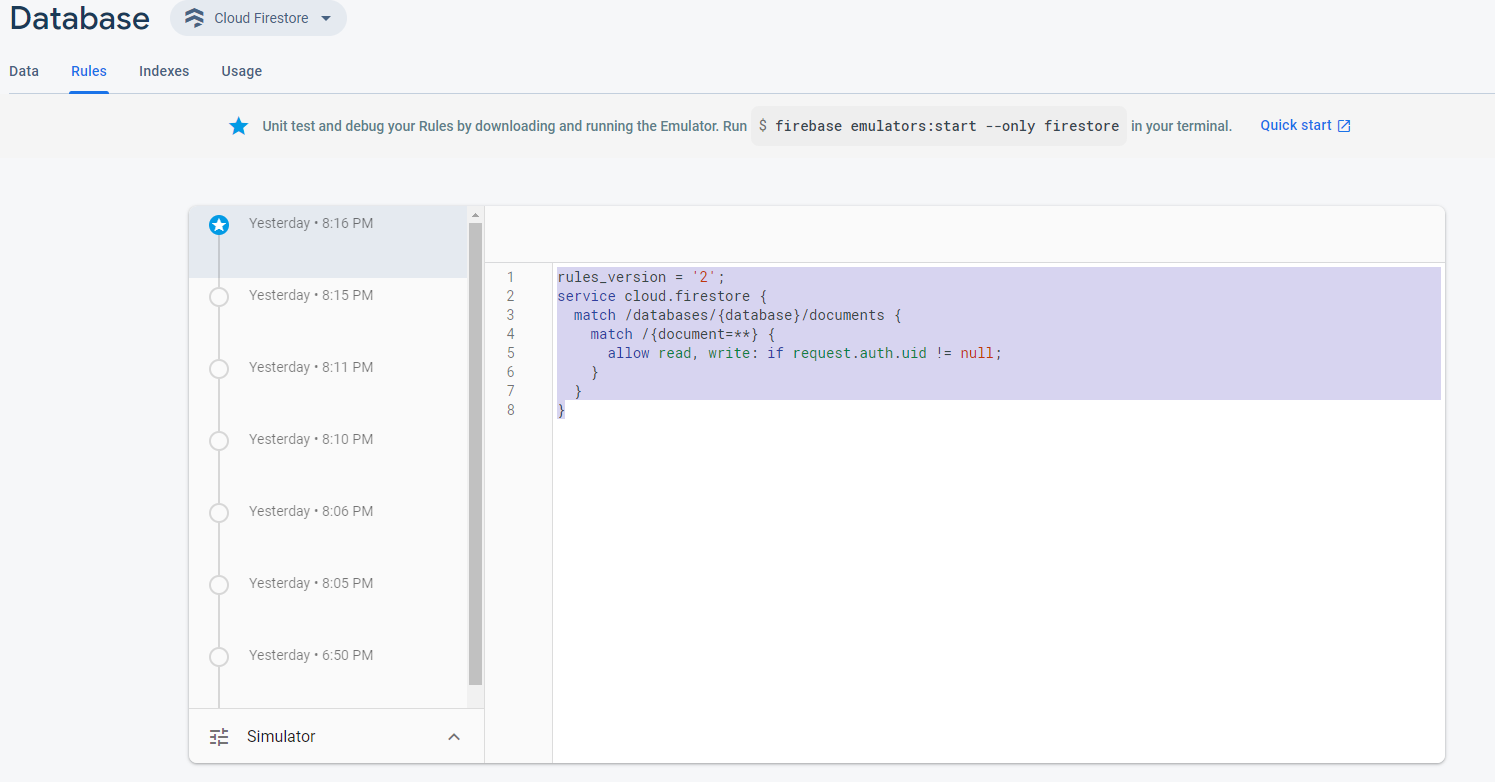
We’ll start with the following rules. Note that these rules will allow any user to read / write any content in your database so you’ll need to write more secure rules before launching**. These rules are not secure** and you should not use them in a real application. For information on how to write more secure rules, check out the documentation.
rules_version = '2';
service cloud.firestore {
  match /databases/{database}/documents {
    match /{document=**} {
      allow read, write: if request.auth.uid != null;
    }
  }
}
We’ll also need to configure the rules for Cloud Storage for Firebase. Go to the Storage section in the left panel and select the Rules tab once again.
Copy the below code snippet into your Storage Rules:
rules_version = '2';
service firebase.storage {
  match /b/{bucket}/o {
    match /{allPaths=**} {
      allow read, write: if request.auth != null;
    }
    match /flamelink/{allPaths=**} {
      allow read;
      allow write: if request.auth != null;
    }
  }
}
Again, these rules are the bare-minimum needed to get a demo working and they are not recommended for production. You must write secure rules before launching your app.
Step 3: Create a Flamelink Account & Project
At this point, you’ll need to link your Firebase project to a new Flamelink project. You can follow this tutorial video to help you get started.
Step 4: Configure Flamelink
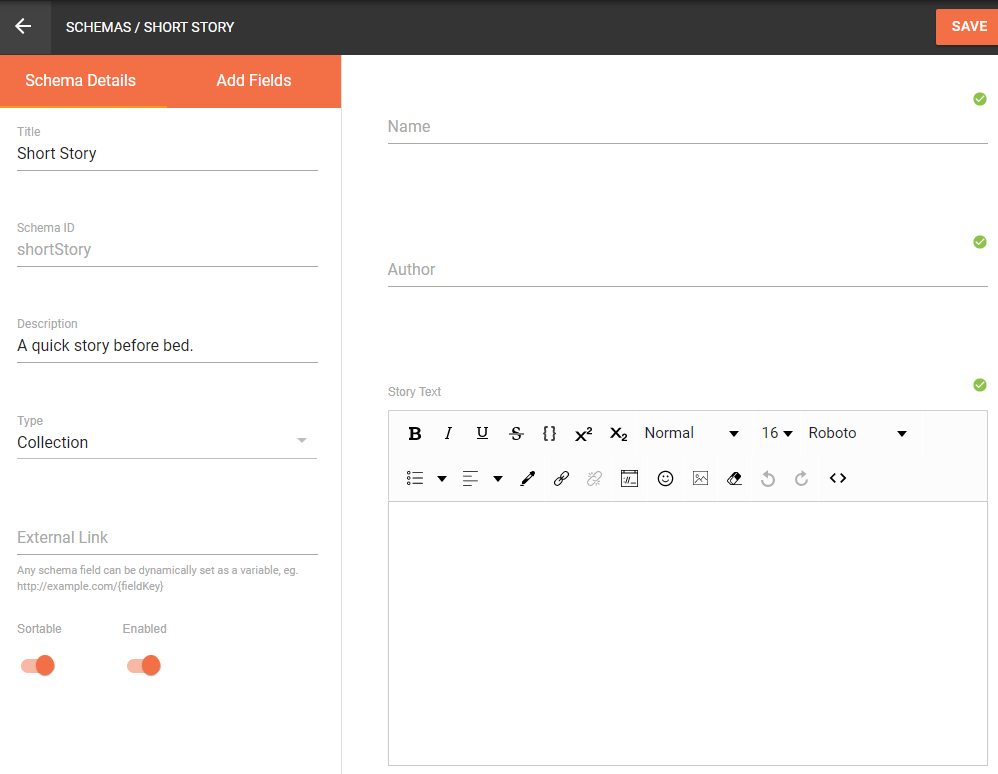
First, create some schemas. A schema is a form view of your data to easily create your content in a repeatable, structured way. For the bedtime stories example project we used two schemas: shortStory and longStory.
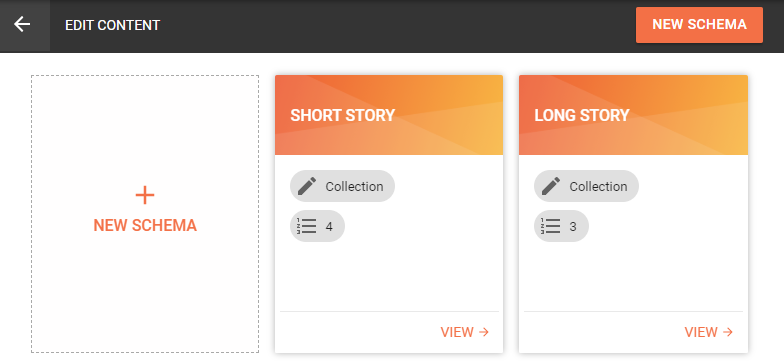
Then, using these schemas, let’s create 5 different Short Stories and 3 Long Stories with whatever filler content you’d like.
Remember, you don’t need to spend too much time on this, just have enough to start building your application. This content is meant to be managed by non-developer content editors and clients.
Step 5: Create New Angular App
The sample app in this tutorial was built using nrwl/nx, so there’s a lot going on, but we will only be working with these files.
public/feature/landing– routed; no auth; public info about apppublic/feature/login– routed; no auth; allows sign onprivate/feature/home– routed; auth required; contains flamelink contentshared/feature/core– not routed; contains shared services for Firebase and Flamelink
You’re welcome to explore / modify any other files in the project, get creative!
Step 6: Install dependencies
From the root of the project directory, run either npm install (or yarn install) to install the dependencies.
Step 7: Set Up Auth with AngularFire
Because this is an Angular site, we’ll use the AngularFire library to quickly and easily add authentication. Let’s create FirebaseService in shared/feature/core. This lets you keep track of auth and allows you to easily sign out. We’ll add FirebaseUI to your login component markup to provide a quick and easy authentication dialog for your users.
<firebase-ui
        (signInSuccessWithAuthResult)="successCallback($event)"
        (signInFailure)="errorCallback($event)">
</firebase-ui>
When a use logs in successfully, we want to have it route the logged in user to home.module so add this to your ngOnInit function in the home.component.ts:
this.firebaseService.authState$.subscribe(
  this.firebaseAuthChangeListener.bind(this)
);
Step 8: Set Up Flamelink in your App
Next we’ll integrate the Flamelink SDK, which is powered by the Firebase SDK, to load content into our app. To do this, create a new service called FlamelinkService in shared/feature/core. This service will be used to subscribe and fetch data when a user is logged in.
Add this to your ngOnInit function in the home.html:
  private firebaseAuthChangeListener(response): void {
    if (response) {
      this.loggedIn = true;

      this.shortStoriesRef = this.flameLinkService.getApp().content
        .subscribe({
          schemaKey: 'shortStory', fields: ['name', 'author', 'text'],
          callback: (error, data) => {
            if (error) { return console.error(error); }
            console.log('data', data);
            this.shortStories = Object.values(data);
            this.shortStoriesFacade.loadShortStories(data);
          }
        });
      this.longStoriesRef = this.flameLinkService.getApp().content
        .subscribe({
          schemaKey: 'longStory',
          fields: ['name', 'author', 'sections'],
          callback: (error, data) => {
            if (error) { return console.error(error); }
            console.log('data', data);
            this.longStories = Object.values(data);
            // this.longStoriesFacade.loadLongStories(data);
          }
        });

 } else {
   this.loggedIn = false;
   if (this.shortStoriesRef) {
     this.shortStoriesRef(); // unsubscribe from short stories listener
   }
   if (this.longStoriesRef) {
     this.longStoriesRef(); // unsubscribe from long stories listener

   }
 }
}
Add this to your ngOnInit function in the home.component.ts:
<li *ngFor="let shortStory of shortStories">
  <short-story
    [shortStory]="shortStory"
    (click)="storyClicked('short', shortStory)">
  </short-story>
</li>
Step 9: Secure Your Database!
Remember to update your security rules before launching. This tutorial used insecure security rules to get you up and running as quickly as possible, you will need to update them before releasing your app.
Here are two Flamelink-specific tutorials for writing Security Rules:
What’s next?
We built Flamelink to enhance the Firebase developer experience. Firebase is such a versatile platform, it’s been mind-blowing for us to see how developers are using Firebase and Flamelink to manage content in a diverse range of use cases. We’ve seen Android and iOS apps, PWAs, VR and AR experiences, IoT platforms, websites, blogs, e-commerce/retail platforms, and AI and ML applications that all leverage Firebase and the Google Cloud Platform. So head over to Flamelink.io, sign up for a 14-day free trial and create your first project.