
This is the third part of a series of articles that dive into creating a new Android application from scratch using Jetpack Compose for the user interface and some other tools offered by Google, like Firebase Authentication, Crashlytics, Cloud Firestore, Performance Monitoring, Remote Config, Firebase Extensions, Firebase Cloud Messaging and Hilt.
Part 1 of this series has an overview of what you can do with this app and how it is structured. Part 2 shows how to implement login and sign up flows using Firebase Authentication. Now we will learn about Firebase Crashlytics, what are the advantages of adding this feature to the application, how to handle errors and display messages to the user.
Firebase Crashlytics
What is Firebase Crashlytics?
Writing error-free software is nearly impossible - not only are you likely to write buggy code, but the underlying software (SDKs, OS, even the hardware) is written by fallible human beings as well, so it is very likely that your application will contain bugs. The question is: How can we find out the bugs that happen in our apps? We can try to reduce the number of bugs as much as possible by writing tests, but some errors only appear in the users’ hands, as they might depend on certain conditions that we didn’t consider when writing our tests.
The problem is that users usually don’t write emails describing what they did that might have caused a crash, so we need to automate this. This is where Crashlytics comes in: It automates the process of capturing what happened when a crash occurred (by capturing the stack trace), and then telling us about it (by uploading the crash report to your Firebase project).
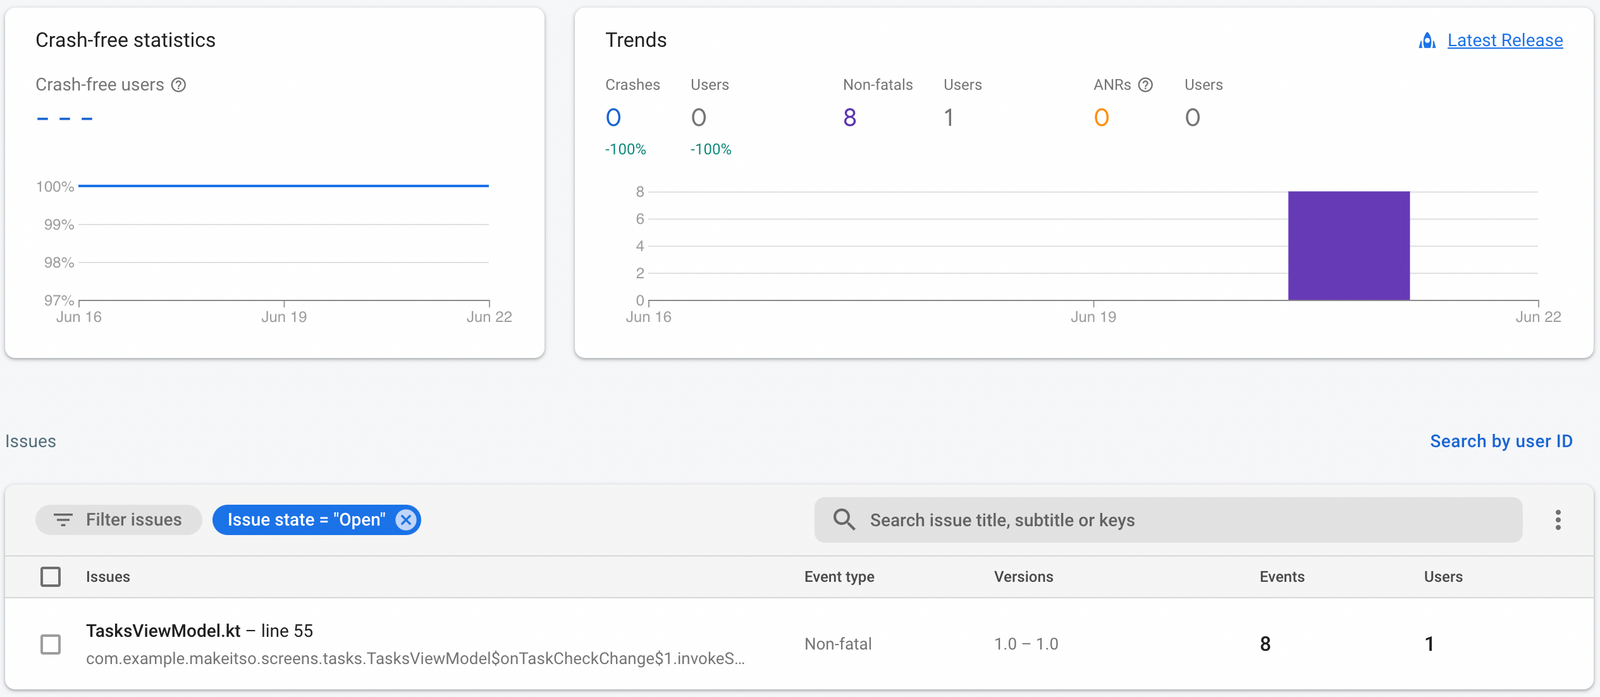
Here’s how it works: Whenever a crash occurs in your app, the Crashlytics SDK will record this crash locally. The next time the user opens the app, Crashlytics will upload the crash report to your Firebase project. Crashlytics will then analyze the stack trace of each crash and cluster it by commonalities, such as device types, OS and app versions, and whether a crash was fatal or non-fatal. These reports are available in the Crashlytics dashboard on the Firebase Console:
Adding Crashlytics to your project
To use Crashlytics, you first need to import the library to the app/build.gradle file:
dependencies {
    // Import the BoM for the Firebase platform
    implementation platform('com.google.firebase:firebase-bom:31.0.0')

    // Declare the dependency for the Crashlytics library
    implementation 'com.google.firebase:firebase-crashlytics-ktx'
}
Next, add the Crashlytics Gradle plugin to the top of the same file:
apply plugin: 'com.google.firebase.crashlytics'And finally, add the Crashlytics Gradle plugin as a buildscript dependency in the project-level build.gradle file:
buildscript {
    repositories {
        // Check that you have Google's Maven repository
        google()
    }

    dependencies {
        // Check that you have the Google services Gradle plugin v4.3.2 or later
        classpath 'com.google.gms:google-services:4.3.14'

        // Add the Crashlytics Gradle plugin
        classpath 'com.google.firebase:firebase-crashlytics-gradle:2.9.2'
    }
}
Done! All you need to do now is sync the project with the Gradle Files by clicking on the File option from the top menu. At this point, you can already benefit from Crashlytics, as you don’t need to do anything else for crashes to be captured and displayed on the Firebase Console.
Testing the Crashlytics integration
To confirm that everything is working as expected, we can force a crash and check if it appears in the Crashlytics dashboard. To achieve this we can modify one of the methods of the AuthenticationService so it throws a RuntimeException as soon as it is called:
override fun authenticate(email: String, password: String, onResult: (Throwable?) -> Unit) {
    throw RuntimeException()

    // Firebase.auth.signInWithEmailAndPassword(email, password)
        //.addOnCompleteListener { onResult(it.exception) }
}
The next step is to run the app and click on the Sign in button that calls the authenticate method above. After that, open the Firebase Console, navigate to the Crashlytics dashboard (Release & Monitor > Crashlytics) and confirm that the crash appeared there.
Please remember that this is only for test purposes, so don’t forget to remove this throw once your test is done.
Adding Crashlytics to Make it So
Creating and using the Log Service
To follow the service interface and implementation pattern that we are using for the rest of the application (refer to part 1 of this series if you’d like a refresher about the app architecture), let’s now create the LogService and the LogServiceImpl. This service will have only one method:
override fun logNonFatalCrash(throwable: Throwable) {
    Firebase.crashlytics.recordException(throwable)
}
We can see that the implementation is very simple: we’re just using the Crashlytics instance to record the exception. Now it is necessary to call this method in places where potential crashes can happen in the code. Most developers will write code like:
try {
    //do something that can throw an exception
} catch(e: exception) {
    print("An error occurred")
}
The problem with this approach is: no one will ever see those error messages. With Crashlytics, you can send your errors to the Crashlytics console so you can see what’s going on without having access to your users’ devices. In order to catch these errors in the authentication process, I’m calling the accountService methods from inside a viewModelScope:
fun onSignInClick(popUpScreen: () -> Unit) {
    viewModelScope.launch {
        accountService.authenticate(email, password) { error ->
            if (error == null) linkWithEmail(popUpScreen) else onError(error)
        }
    }
}
There are some reasons for going with this approach: Any coroutine launched in this viewModelScope is automatically canceled if the ViewModel is cleared. Also, we can easily add a CoroutineExceptionHandler to the scope. A CoroutineExceptionHandler can be used as a generic catch block to handle all exceptions that are thrown inside a launch block during its execution. In our case, we will use the exception handler to log the crash to Crashlytics and to display an error message to the user:
private val exceptionHandler = CoroutineExceptionHandler { _, throwable ->
    SnackbarManager.showMessage(throwable.toSnackbarMessage())
    logService.logNonFatalCrash(throwable)
}
Now all we have to do is add our exceptionHandler to the launch block:
fun onSignInClick(popUpScreen: () -> Unit) {
    viewModelScope.launch(exceptionHandler) {
        accountService.authenticate(email, password) { error ->
            if (error == null) linkWithEmail(popUpScreen) else onError(error)
        }
    }
}
Displaying messages to the user
You might have noticed from the code snippet above that we are using a SnackbarManager to display messages to the user. SnackbarManager is an object defined in Make It So codebase that has only one objective: to post messages into a mutableState of SnackbarMessage:
object SnackbarManager {
    private val messages: MutableStateFlow<SnackbarMessage?> = MutableStateFlow(null)
    val snackbarMessages: StateFlow<SnackbarMessage?> get() = messages.asStateFlow()

    fun showMessage(@StringRes message: Int) {
        messages.value = SnackbarMessage.ResourceSnackbar(message)
    }

    fun showMessage(message: SnackbarMessage) {
        messages.value = message
    }
}
The SnackbarMessage is a sealed class that has two other classes inheriting from it: the StringSnackbar (to display String messages) and the ResourceSnackbar (to display the messages that are defined as a resource in the strings.xml file):
sealed class SnackbarMessage {
    class StringSnackbar(val message: String): SnackbarMessage()
    class ResourceSnackbar(@StringRes val message: Int): SnackbarMessage()
}
Any ViewModel in the application can access the SnackbarManager to call the showMessage method and pass the messages that should be shown to the user. The only thing that the showMessage method does is post these messages into a mutableStateFlow. Then, the MakeItSoAppState class will listen to the messages posted in this mutableStateFlow and show each one of them in the snackbarHostState of the application:
class MakeItSoAppState([...]) {
    init {
        coroutineScope.launch {
            snackbarManager.snackbarMessages.filterNotNull().collect { snackbarMessage ->
                val text = snackbarMessage.toMessage(resources)
                scaffoldState.snackbarHostState.showSnackbar(text)
            }
        }
    }
}
If you would like to learn more about this Snackbar implementation, check out its documentation in its Github repository.
Code improvements
With this in place, we can now log errors in all our ViewModels. Looking at the code, you might notice that this will inevitably result in quite a bit of duplicated code. Let’s refactor the codebase by creating an abstract class MakeItSoViewModel that contains the methods for logging and displaying errors:
open class MakeItSoViewModel(private val logService: LogService) : ViewModel() {
    open val showErrorExceptionHandler = CoroutineExceptionHandler { _, throwable ->
        SnackbarManager.showMessage(throwable.toSnackbarMessage())
        logService.logNonFatalCrash(throwable)
    }

    open val logErrorExceptionHandler = CoroutineExceptionHandler { _, throwable ->
        logService.logNonFatalCrash(throwable)
    }
}
Now we can modify each one of the ViewModels to extend the MakeItSoViewModel and delete the CoroutineExceptionHandler created previously in each one of them. At the moment, the only two properties that are shared between the ViewModels are showErrorExceptionHandler (for cases where we need to log the error to Crashlytics and display a message to the user) and logErrorExceptionHandler (for cases where we only need to log the error, but no message should be displayed). We can add more commonly used properties and methods in the future.
@HiltViewModel
class LoginViewModel @Inject constructor(
    private val accountService: AccountService,
    private val storageService: StorageService,
    private val logService: LogService
) : MakeItSoViewModel(logService)
Summary
The last thing a developer wants after putting in countless hours to make their app perfect, is to go to the Play Store only to read dozens of negative reviews because the app crashed for their users. This is why being able to monitor your application for crashes and errors is so important. Being aware of an unexpected amount of crashes and errors in your app helps you to fix errors quickly and ensure the best possible experience for your users.
Crashlytics is a great tool to see if your app crashes. It not only tells you why and where in the code the errors occur, but also groups them based on commonalities, which can help you to understand what is going on. It’s easy to use, and very easy to add to your project: just add the dependency and recompile.
By seeing crashes early on, you can identify problematic parts of your app and fix errors quickly. Fewer crashes = happier users = more revenue!
What’s next
In part 4 of this series, we will look into Cloud Firestore (Google’s horizontally scaling NoSQL document database in the Cloud). We will use it to store to-do items in the cloud. One of the cool features of Cloud Firestore is its ability to sync updates in real time - stay tuned to learn how to use this feature in Jetpack Compose apps.
The source code for Make it So for Android is available in this Github repository - all the code you saw in this article is available in the v1 folder.
This article shows how to use callbacks to pass results between Services and ViewModels, but this pattern is used only in a specific version of the Make it So app. Therefore, you must checkout the v1.0.0 tag if you want to have access to this code specifically. A more recent version uses Kotlin Coroutines and Kotlin Flow instead of callbacks (see part 5 of this series to understand how this change affects the Services shown in this article).
If you’re also interested in iOS/Mac development, the same application is available for these platforms as well. The iOS/Mac version uses SwiftUI for building the user interface, which also follows the declarative UI model, similarly to how we build UIs in Compose. You can find the source code in this Github repository.
If you have any questions or suggestions, feel free to reach out to us on the discussions page of the repository.