
From House ID to a First Person Shooter game, the App Prototyping agent in Firebase Studio has enabled business professionals, hobbyists, and a broad spectrum of software developers to create delightful web applications. Many said that they were able to do so in a dramatically shorter timeframe than working alone and the experience was magical. From a distance, it looks like they were able to do so effortlessly. The truth is, personal background and experience, prompting techniques, and patience all contribute to a successful outcome. In this blog post, I will share prompting tips and tricks, using a basic web application for Enterprise Resource Planning (ERP) built with the Prototyper as an example. By explaining the “why” behind each tip, I hope this blog post will set realistic expectations and lead to a happier developer experience for all, regardless of your technical expertise. Let’s get started.
Initial prompt
Prepare an elevator pitch
Initial prompts from as short as two words like “Go game” to as long as thousand-word Product Requirement Documents (PRD) have gone on to produce beautiful and functional web applications. This is possible because the Gemini models behind the prototyper can enrich and extract information from input of various lengths. Extremely short or extremely long prompts are not objectively wrong. However, they may introduce false expectations. As of today, the Prototyper is designed to generate a web application of no more than 10 core features on the first try. When you enter very short or expansive initial prompts, you might not get exactly what you envisioned.
Generally speaking, it’s better if you approach the initial prompt like an elevator pitch that takes roughly 10-30 seconds to say out loud, and in it you describe what the app is, what it does, and how it looks briefly. This ensures that you get the optimal alignment on application complexity with the prototyper. Here is an example:
- “Build a basic ERP for small businesses with a dashboard showing revenue, expenses, and profit, plus a calendar for appointments.”
Don’t worry if your initial prompt isn’t fleshed out yet. We recently added an “Enhance your prompt” option in the input field that appears as you type. Click the link to get an improved version of your prompt. The enhanced prompt of the above example looks like this:
- “A basic business management app designed to simplify financial tracking and scheduling for small businesses. Key features include a dashboard displaying real-time revenue, expenses, and profit summaries, tools to add and manage income and expense records, and an integrated calendar for scheduling and viewing appointments. Use a clean, professional green and white color scheme.”
Use Gemini as your prompt editor
If you’re still deciding how your application will work or how it will look, Gemini is a great place to have a back-and-forth conversation. Draft your initial prompt, then ask Gemini 2.5 Flash with Search grounding or Deep research to make it a power prompt, before you head back to Firebase Studio to prototype the application.
I asked Gemini about the typical features of an ERP application, and it gave me a list of essential functionalities including sales and order management, inventory management, and Customer Resource Management (CRM). After learning more about each feature by asking questions, I felt sufficiently informed on the topic and more confident to carry on.
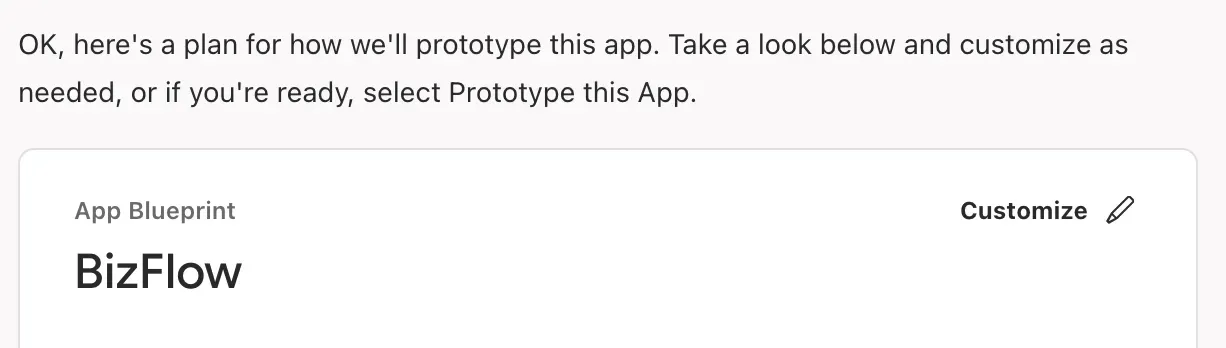
App blueprint
Turn user journeys into features
As mentioned before, the prototyper turns your initial prompt into an app blueprint. The app blueprint outlines the core features, style guidelines, and technical stack of your application and acts as an agreement between you and the source code that will be generated. It is also editable.
When editing the core features of the app blueprint, think about how you expect the user to interact with your application from start to finish. Take note of what you consider to be anchoring experiences along the way. The more atypical these user interactions are, the more important it is to give explicit instructions. Remember that what users must, should, and could do are enabled by product features. Your job is to connect the ideas in user-centric language.
The prototyper came up with following core features for the ERP application:
- “Dashboard — Display a summary of revenue, expenses, and profit metrics.”
- “Income/Expense Tracking — Allow users to log income and expenses.”
- “Appointment Calendar — Show a calendar interface with appointments and scheduling.”
Mix and match features and styles
If you haven’t tried this yet, you’ll find the prototyper can output different app blueprints from the same initial prompt. This is expected due to the non-deterministic nature of LLM output, which we can take advantage of through human-in-the-loop involvement. Before generating the source code, I repeat the initial prompt and get a few different versions of the app blueprint. Personally, I enjoy comparing different app blueprints. It encourages me to think instead of clicking ahead hastily. I also become more opinionated as I make decisions on how to mix and match core features and develop a sense of what appeals to my design sensibilities.
For the ERP application, I included a fourth feature that showed up in a subsequent app blueprint:
- “Client Management — Client Management: Store client contact details, track interactions, and manage client-specific tasks.”
I also changed up the style guides to my liking by tweaking the color scheme.
Prototype view
One change per conversation turn
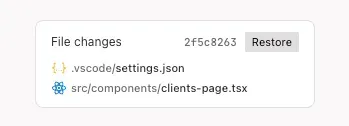
If the app blueprint looks good, it is time to start generating the application. Stay in the Prototyper view to add, modify, and delete parts of the user experience. Don’t ask for all the changes at once. Request one change per conversation turn to keep the Prototyper focused. Think in terms of code changes that need to happen to make the next commit; in other words, identify good stopping points that you aim to get to and you can come back to. This way, if you mess up or don’t like the subsequent changes, you have the option of easy rollback using the Restore feature. The Restore button appears next to the files in the File changes card in the dialog pane.
Here is an update I wanted to make in the ERP application:
- Allow users to upload a receipt when they enter their expense and automatically populate the total expense field from the uploaded receipt
Instead of requesting this as one change, I broke it up into two:
- Allow users to upload a receipt when they enter their expense
- Automatically populate the total expense field from the uploaded receipt
In case it’s not obvious how to break up certain larger tasks, feel free to ask the prototyper for help and have it step through the implementation one change at a time.
Ask for options
Asking the Prototyper for alternative designs and plans may come as an afterthought if the initial suggested path failed to lead to a successful end. You can preempt this failure mode by engaging in self-consultation early. Of course, deciding when to do so depends on how much time you have, how familiar you are with the technologies, and how motivated you are to learn. One recommendation for a good time to ask for options is if a particular feature implementation involves different paying services.
Before asking the Prototyper to proceed with automatically populating the total expense field from the uploaded receipts, I asked it to present a few choices. I knew different Optical Character Recognition (OCR) solutions existed, such as Google Cloud Document AI and Vertex AI Vision. I was interested in how the prototyper weighed the different APIs given its contextual knowledge of my codebase.
- Tell me at least two ways to implement total amount extraction from receipt images, explain their pros and cons
After reading through the comparisons in the Prototyper’s response, I went with Gemini Flash model for OCR because it had an easier integration with my AI stack. The trade-off in development complexity is well worth the increase in accuracy. I rephrased my request by telling the prototyper exactly what to do:
- Before users click “Log Expense”, if a receipt image is uploaded, use a Gemini multimodal model to extract the total amount paid in the uploaded receipt image for the “Amount” field
Build from simple to complex, but if necessary, back to simple
If everything goes smoothly, you continue to grow your application by adding more features and functionalities through prompting. However, as your application becomes more complex, debugging via chat is likely to hit a snag. When that happens, see if you are willing to simplify your more ambitious ideas with mock data temporarily, and come back to flesh them out in the Code view.
For example, I added a check for duplicates using fake CRM data instead of connecting to a real CRM database.
- Before users click “Add Client”, check if the email entered exists in a mock CRM database to avoid duplicates
Code view
Ask about limitations
I touched on jumping into the Code view for more advanced feature development and debugging. Another reason you might want to do so is because of the known limitations of the prototyper. You have probably noticed that the technical stack section of the app blueprint is not modifiable today. For AI, the default is Gemini and Genkit. For UI, they are TypeScript, NextJS, and Tailwind CSS. While these are stated as-is and easy to find, limitations introduced in the system prompts of the prototyper aren’t as obvious. Sometimes when you see the prototyper getting stuck, it is due to conflicts between your instructions and its system instructions. You can learn about these limitations by asking about them, for example:
/askTell me about the constraints you have around creating JSON schemas
Here, I used the slash command /ask. This allows me to have many side conversations for learning purposes without impeding the main conversation flow used for prototyping.
Upgrade to Gemini 2.5 Pro
You can also upgrade from the built-in Gemini 2.0 model to Gemini 2.5 Flash or Pro model for more advanced reasoning and web browsing capabilities. There is a dropdown menu in the input field in the Code view. Follow the on-screen instructions to get an API key from a paying Google Cloud project. Note that Gemini 2.5 Pro currently does not offer a free tier. I also recommend learning about its training cutoff dates.
Provide API examples
Newer Gemini models have more recent knowledge of many public APIs. If the APIs you want to use have been updated since the training cutoff date, provide the URL to the official documentation to the prototyper when asking it to integrate with those. Similarly, if you want to use private APIs, you can copy and paste relevant API examples.
I chose to integrate with HubSpot Free CRM in my application. With the correct file that needed the update opened, I prefixed the following prompt using the /generate command to get the code suggestion:
/generatecreate, update, and delete contacts using email lookup as described here: https://developers.hubspot.com/docs/guides/api/crm/objects/contacts
What’s next
As you develop and debug, remember to pause and reflect on what you have learned and how you learned it along the way. You will notice that the more knowledgeable you become in a topic, be it game board generations or API integrations, the better you become at prompting in that topic. And the more you do it, the more confident you become. It may even feel like you are starting to see the matrix!
We will continue to publish more tips and tricks to help you get the most out of Firebase Studio, and we can’t wait to see what you will create!