Firebase can help you build and run modern, AI-powered experiences that users love. And our platform is designed to support you throughout your app development journey – even in the earliest stage when you’re evaluating if Firebase is the right fit for you and your app.
To help you with this earliest stage, check out this how-to guide for claiming $300 of free credits that you can use with any Firebase service! These credits are part of Google Cloud’s Free Trial Program. With these credits, you can explore the full functionality of Firebase without a financial commitment.
Whether you’re building your first app or looking to enhance an existing one, these Free Trial credits will help you experiment, innovate, and bring your ideas to life!
Step 1: Confirm your eligibility
Check if you’re eligible for the Free Trial.
If you’re eligible, you’ll be prompted with next steps to sign up and claim the Free Trial credits.
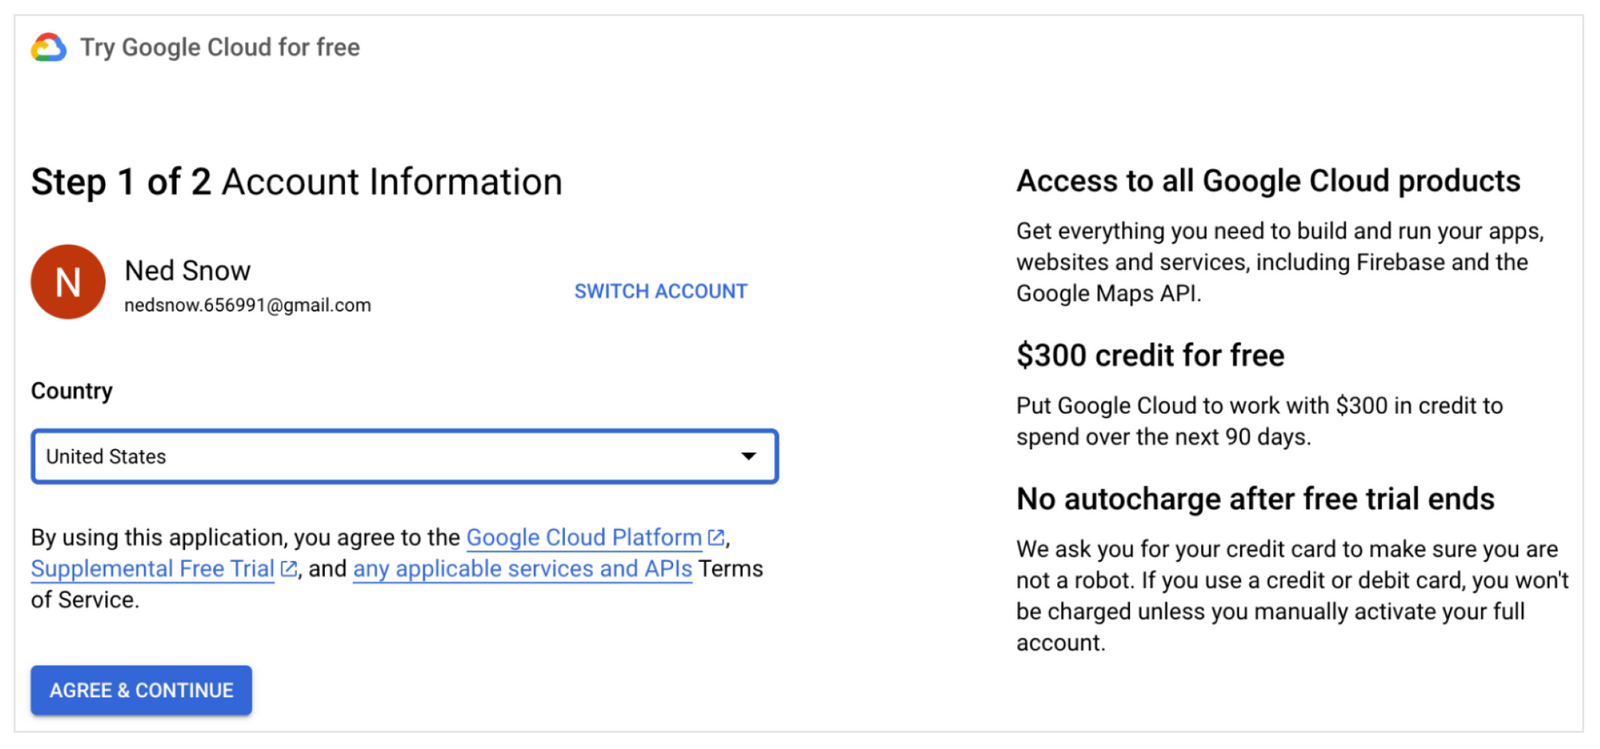
Step 2: Sign up for the Free Trial to claim $300 of credits
Go through the account setup steps in the Free Trial signup page to claim the credits. The 90-day, $300 Free Trial period starts automatically when you activate the Free Trial credits.
As part of these steps, you’re asked to provide a credit card or other payment method to set up a Cloud Billing account and verify your identity (and prove that you’re not a robot!). Your payment information helps us to prevent fraud and abuse.
But don’t worry – setting up a Cloud Billing account doesn’t enable us to charge you. You’re not charged unless you explicitly upgrade your Cloud Billing account to a “paid account”. You can upgrade to a paid account at any time during the Free Trial. After you’ve upgraded to a paid account, you can still use any remaining credits (within the 90-day period).
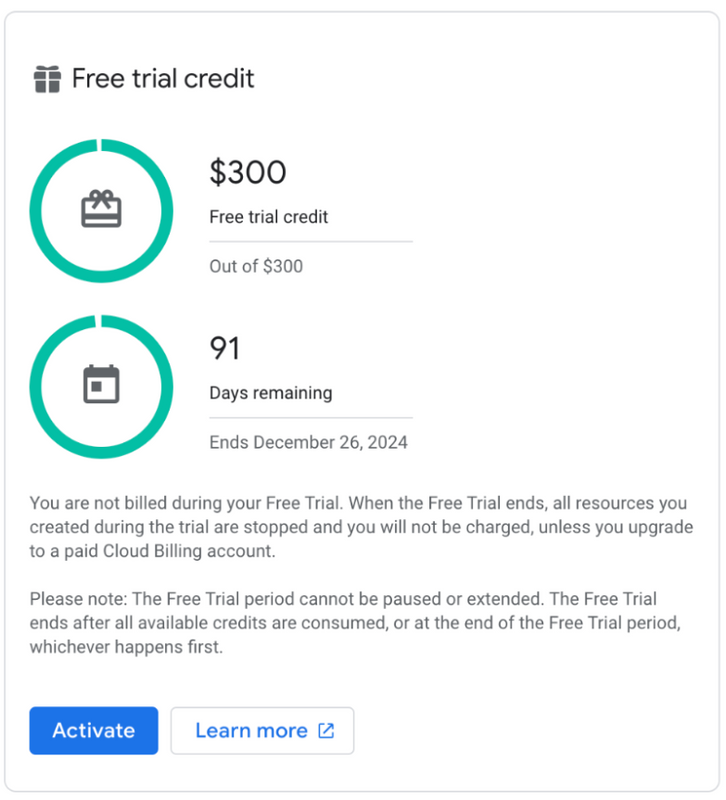
Step 3: Link your billing account to your Firebase project
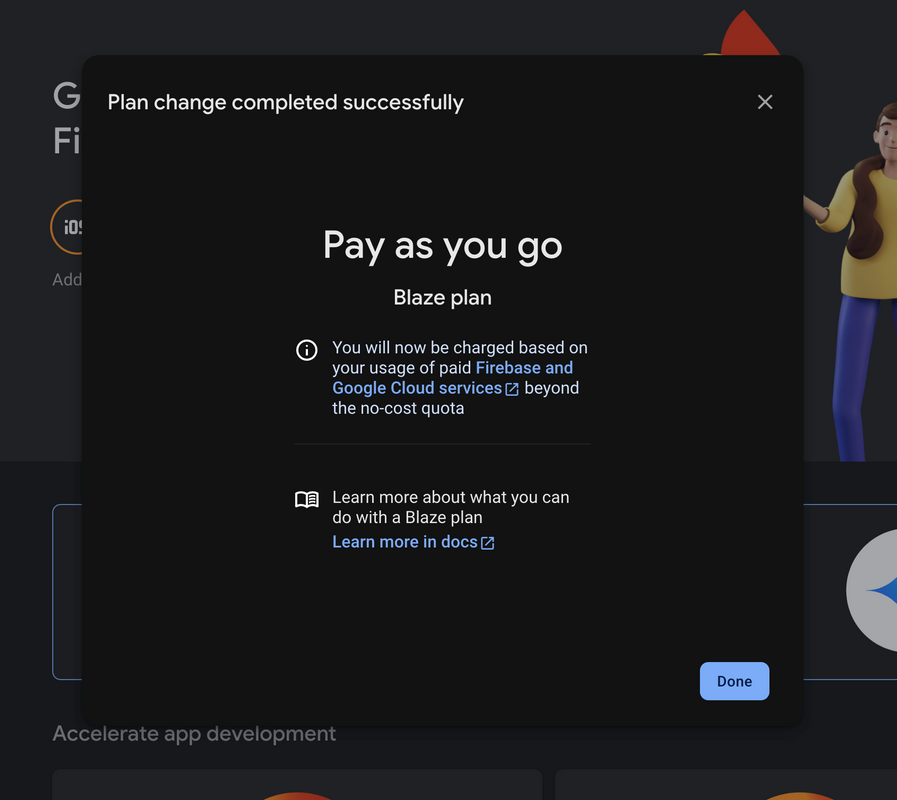
Now that you have a Free Trial billing account, you can link it to your Firebase project. In Firebase, when you link a billing account, your project is upgraded to the pay-as-you-go Blaze pricing plan. All charges will be against your Free Trial billing account and the $300 of credits.
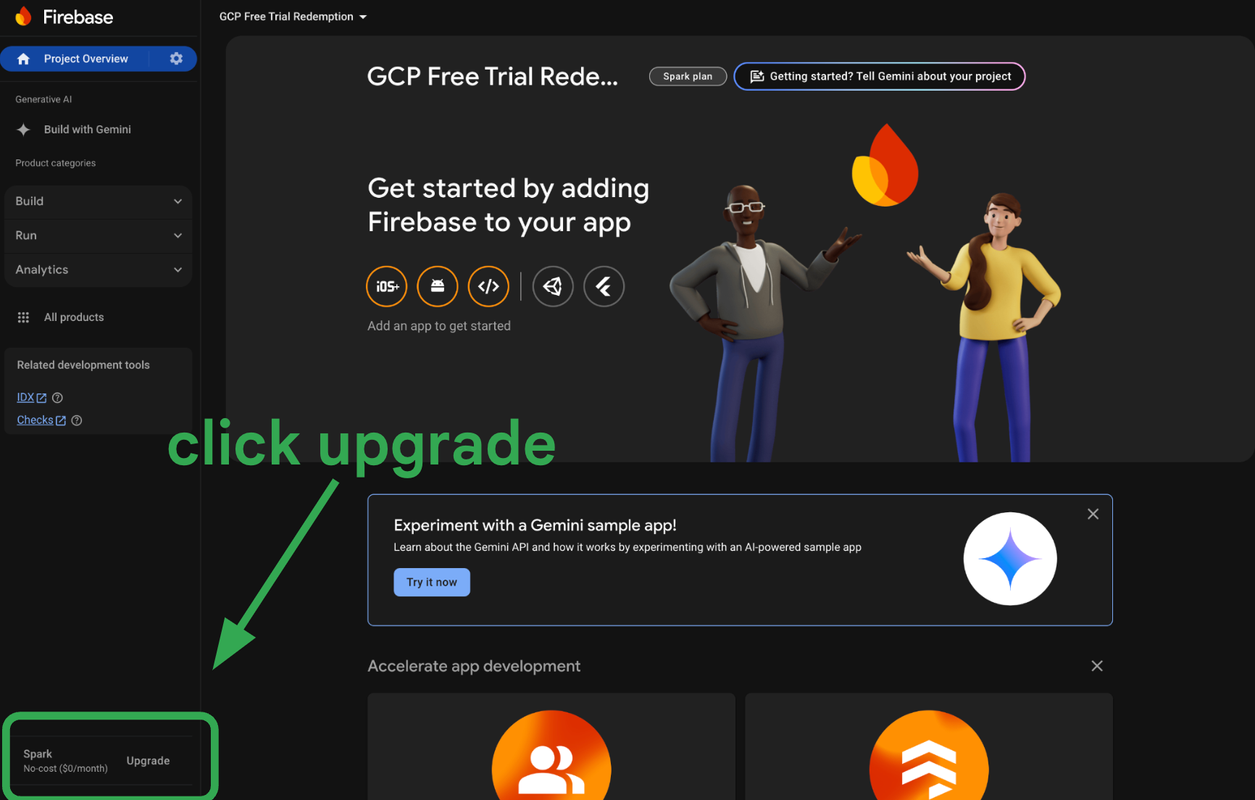
First, go to the Firebase console to create a new Firebase project or open an existing project. Then, in the bottom left-corner of your open project, click “Upgrade”, and then select the “Blaze plan”.
Next, from the dropdown menu of Available Cloud Billing accounts, select the billing account you just set up.
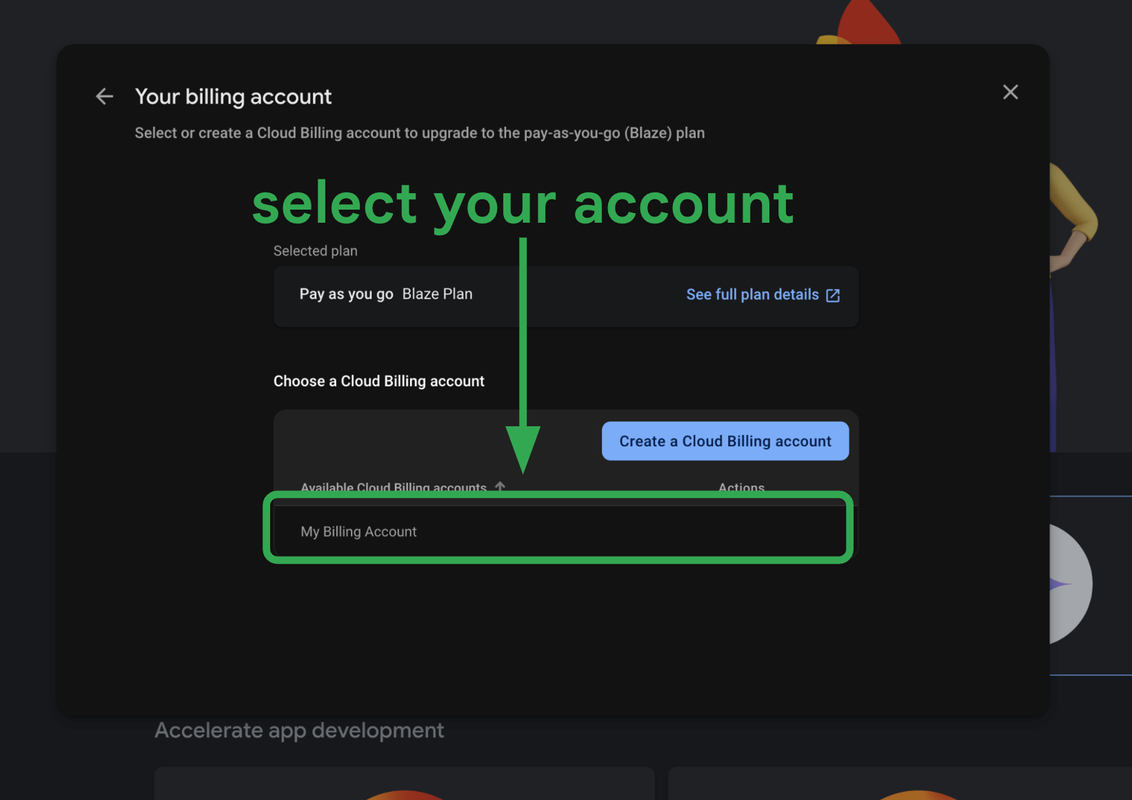
And now you’re upgraded! Your Free Trial billing account is now linked to your Firebase project.
Step 4: Start building!
Congratulations! You’ve applied the Google Cloud Free Trial to your Firebase project and can now integrate and prototype with any Firebase product and service without a financial commitment. Your Free Trial ends when one of the following happens:
- You’ve spent the $300 in credits.
- 90 days have elapsed since you signed up.
Now you can try out the best of Firebase! Try out our get to know Firebase codelab to learn more about adding Firebase to your web apps! Also, check out this video for an intro about Firebase and how to use it.
Throughout your Free Trial period, your remaining credits and days are displayed on the Billing Account Overview page in the Google Cloud console. You’re not billed during your Free Trial. When the Free Trial ends, all resources you created during the trial are stopped, and you will not be charged, unless you upgrade to a paid Cloud Billing account. You also always have the ability to downgrade your Firebase project back to the Spark pricing plan. Check out the GCP Free Trial Terms and Conditions or FAQs to learn more.

